Tag: Thor’s Mint Chocolate Baked Alaska / Easy Baking Tips / Mastery Guide For Baking/ Pro Tips For Beginner Bakers

  • Thor’s Mint Chocolate Baked Alaska

    Thor’s Mint Chocolate Baked Alaska

    Thor’s Mint Chocolate Baked Alaska — Showstopping -Three Layer Dessert Recipe

    Why You Will Love This Mint Chocolate Baked Alaska

    Three incredible layers — chocolate cake, peppermint ice cream, toasted meringue all in one dessert Completely beginner friendly — no single step is difficult when taken one at a time Make ahead design — ice cream and cake made day before, assembled and baked day of serving Shortcut friendly — store bought ice cream and box cake mix work perfectly Showstopper presentation — guaranteed to impress at any dinner party or celebration Science is delicious — the meringue insulates the ice cream so it stays frozen through oven baking

    Thor’s Mint Chocolate Baked Alaska — Showstopping Three Layer Dessert Recipe

    The Marvel Cinematic Universe (MCU) baking series is trucking right along, even in the face of a minor setback.  This week’s post was originally supposed to be based on Iron Man 2, but I’ve decided to delay that recipe due to the seasonal availability of the fruit I plan to use.  To make up for it, I’ve jumped ahead to my one of my favorite superheroes: Thor!

    I remember being super psyched for this movie when it came out, and I was not disappointed.  Admittedly, the CGI is a little weird at times, but I still stand by the mighty Thor.  On a related note, I’m really into the recent Thor comic book series and subsequent Mighty Thor line.  Beautiful artwork, accessible story lines, and a female Thor.  What’s not to like?  I’d definitely recommend it if you’re into comic books.

    But I digress. According to the IMDB summary of the movie, “The powerful but arrogant god Thor is cast out of Asgard to live amongst humans in Midgard (Earth), where he soon becomes one of their finest defenders.” After intruders break into (what amounts to) the royal vault with the help of Loki, Thor reignites the ancient conflict between the Asgardians and the frost giants of Jotunheim. As punishment for his arrogance, Odin declares Thor unworthy and sends him to Midgard to learn his lesson. There, he meets and befriends scientists Jane Foster, Eric Selvig, and Darcy Lewis, who help him to develop a sense of humility in his human form. Through a selfless act, Thor regains his worthiness and is again able to wield his hammer (as well as fly, summon lightning, etc.). Soon after, when Thor returns to Asgard, he chooses to destroy the Bifrost (rainbow bridge) in order to save Midgard from destruction, severing his link to his human friends in the process.

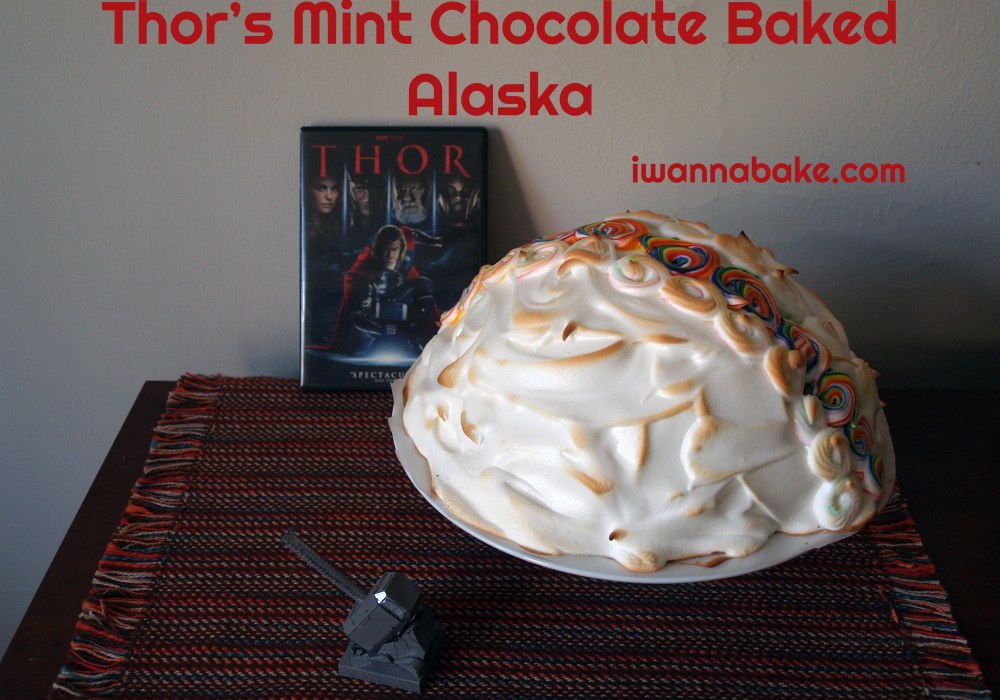
    There’s a lot going on in this movie, so I knew I needed to bake something that had a lot going on. I landed on baked Alaska pretty quickly. Aside from it being a somewhat over the top dessert, it conveniently has three layers that can represent the three realms (there are nine total) that are represented in the movie. The chocolate cake base represents Midgard (Earth), the peppermint ice cream represents Jotunheim, and the meringue layer represents Asgard. I decided to add a rainbow arc across the top of the meringue to represent the Bifrost. Josh and I even went so far as to destroy it with Mjolnir:

    While I pulled recipes together from a couple different places, I didn’t make too many changes to the actual recipes themselves.  For the ice cream, I opted for peppermint extract instead of fresh mint leaves.  I’ve tried it with the mint leaves before and didn’t think it had sufficient flavor.  For the cake, meringue topping, and baking instructions, I looked to my trusty copy of Joy of Cooking.  I added some instant coffee granules to the chocolate Genoise sponge cake recipe to accent the chocolate flavor a bit (and as a nod to the scene in the movie where Thor smashes his mug in appreciation of his coffee).  I also colored a small portion of the meringue rainbow so that I could add some thematic decoration to the top.  Other than that, the recipes are mostly as written.

    I’m not going to lie, this is definitely a “dirty every kitchen tool and dish you own” kind of dessert. If you make all of the components from scratch, you will need something to churn your ice cream with, a large bowl, a 9″ cake pan, a rimless baking sheet, an electric mixer, various sizes of saucepans, and several mixing bowls, among other usual kitchen bits and bobs. You can definitely use store-bought ice cream and cake from a box instead. I wouldn’t judge you for shortcutting this a bit. However, while this takes a lot of time and tools, none of the steps are particularly difficult. If you take your time and pay close attention to what you are doing, you can recreate this baked Alaska, no sweat.

    Ingredients for Thor’s Mint Chocolate Baked Alaska

    For the peppermint ice cream:

    • 2 cups heavy cream
    • 1 cup whole milk
    • ⅔ cup granulated sugar
    • ⅛ tsp. salt
    • 6 egg yolks
    • ½-1 tsp. peppermint extract, to taste
    • green food coloring (optional)

    For the coffee chocolate Genoise sponge cake:

    • 2 Tbsp. unsalted butter
    • ¼ cup + ½ Tbsp. cake flour
    •  unsweetened cocoa powder
    • 1 Tbsp. instant coffee granules
    • 3 large eggs, room temperature
    • ½ cup granulated sugar
    • ½ tsp. vanilla extract

    For the soft meringue topping:

    • 2 Tbsp. cornstarch
    • 2 Tbsp. granulated sugar
    • ⅔ cup water
    • 8 egg whites, room temperature
    • 1 tsp. vanilla extract
    • ½ tsp. cream of tartar
    • 1 cup powdered sugar
    • gel food coloring in rainbow colors (optional)

    Equipment You Will Need

    Ice cream maker with bowl frozen at least 12 hours ahead 9 inch round cake pan Large mixing bowl (for molding ice cream) Plastic wrap Stand mixer with whisk attachment Rimless baking sheet (or rimmed sheet used upside down) Fine mesh strainer Rubber spatula 12 inch piping bag with small star tip Clean paintbrush (for rainbow decoration) Large skillet (for double boiler setup)

    How to Make Mint Chocolate Baked Alaska — Step by Step

    Step:1

    The first component to make is the ice cream.  You will need an ice cream maker of some sort (I use this handy gadget).  If you are using the one I use, be sure to freeze the bowl for at least 12 hours before you plan to churn your ice cream.

    In a medium bowl, whisk the egg yolks until smooth. Set aside.

    Whisk together the heavy cream, milk, sugar, and salt in a medium saucepan and bring to a simmer. Cook, whisking constantly, until the sugar is completely dissolved (about 5 minutes).

    Step:2

    Pour approximately a third of the hot cream mixture into the egg yolks, whisking quickly the whole time, until smooth.

    Whisk in the remaining cream mixture until smooth and return the mixture to the saucepan.

    Heat the mixture over medium heat, stirring continuously, until it is thick enough to coat the back of a spoon.

    Stir in the peppermint extract and food coloring (if using) until fully-incorporated.

    Step:3

    Strain the ice cream base through a fine-mesh strainer into a heat-proof bowl and leave it to cool to room temperature on the counter.

    When the ice cream base is approximately room temperature, press a layer of plastic wrap directly onto the surface (this prevents it from forming a skin) and refrigerate for at least four hours.

    When you are ready to churn your ice cream, first prepare the bowl you will mold your baked Alaska in. Line the inside of the bowl with plastic wrap so that it is completely covered and the plastic wrap hangs over the edge about an inch.

    Take your ice cream base out of the fridge and remove the plastic wrap. Churn according to your ice cream maker’s directions.

    Scrape the ice cream into the prepared bowl and smooth the top with a spatula. Place the bowl in the freezer to harden the ice cream for at least four hours.


    While the ice cream is hardening, make the cake layer. Preheat your oven to 350°F and line the bottom of a 9″ cake pan with parchment paper. Melt the butter in a small saucepan and set aside.

    Step:4

    In a medium bowl, whisk together the cake flour, cocoa powder, and coffee granules until well-mixed and aerated.

    Fill a large skillet approximately halfway with water and bring it to a simmer. In a medium, heat-proof bowl, whisk together the eggs and sugar.

    Place the bowl inside the skillet of simmering water and whisk continuously until the egg mixture is warm to the touch.

    Remove the bowl from the water and transfer the mixture to a stand mixer. Beat with the whisk attachment until it approximately triples in volume (about five minutes). When you pull the whisk out of the egg mixture, a continuous ribbon of egg should stream into the bowl.

    Sprinkle a third of the flour mixture across the top of the bowl and gently fold it in with a rubber spatula until it is fully-incorporated. Repeat twice with the remaining flour.

    Reheat the melted butter and transfer it to a glass measuring cup or small bowl. Pour approximately ¾ cup of the cake batter into the hot butter and fold them together until smooth.

    Scrape the butter batter mixture back into the remaining batter and fold together until well-combined.

    Scrape the cake batter into the prepared cake pan and bake for about 15 minutes, or until the cake begins to pull away from the edge of the pan and the top springs back when lightly pressed in the middle (the dark spot on the cake below is from me testing it too soon and leaving a dent).

    Leave the cake to cool in the pan for 10 minutes, then run a sharp knife around the edge and flip it out onto a cooling rack (remove the parchment paper from the bottom in the process). Allow to cool completely.

    When the cake is cool and your ice cream has hardened, it’s time to stuff it into the bowl with the ice cream. Mine was about ½” too big in diameter, so I just carefully squished it in and it worked out fine. If yours is much bigger than that, you might need to trim the edge a little to fit into the bowl. Regardless, at this point, press the cake, top facing the ice cream, into the bowl.

    Return the bowl to the freezer while you prepare the meringue topping.

    Step:5

    Preheat your oven to 450°F and line a rimless baking sheet with parchment paper. If you don’t have a rimless baking sheet, you can try using a regular cookie sheet upside down (veeeery carefully), or you can just serve it off the cookie sheet.

    Prepare a 12″ piping bag with a small start tip (I used a Wilton #21) and fold the edge over.  Place the bag inside a tall drinking glass to keep it standing up.  Using a clean paint brush, carefully paint 2-3″ stripes of food coloring in each color of the rainbow inside the bag up to the edge of the coupler or tip.

    In a small saucepan, stir together the cornstarch, granulated sugar, and water.

    Bring the mixture to a boil over medium heat, stirring quickly and continuously. Cook for 15 seconds to form a thick paste, then remove the saucepan from the heat and cover it.

    Using a stand mixer with whisk attachment, beat the egg whites until they are foamy.

    Step:6

    Add the vanilla extract and cream of tartar and beat on medium speed until soft peaks form.

    Reduce the mixer’s speed to the lowest setting and add in the powdered sugar 1 tablespoon at a time, making sure that the sugar gets fully-incorporated after each addition.

    Increase the mixer’s speed to high and beat until stiff, glossy peaks form.

    Reduce the mixer’s speed to the lowest setting again and add in the cornstarch paste 1 tablespoon at a time as you did with the powdered sugar. Increase the speed to medium and beat for 10 seconds.

    Fill the piping bag you prepared earlier approximately halfway with the meringue topping and twist the top shut.

    Remove your ice cream and cake from the freezer and carefully turn it out onto your rimless baking sheet. This is best done with two people if you have an extra helper around.

    Remove the plastic wrap from the top and discard.

    Step:7

    Spread the remaining meringue all over the ice cream and cake, making sure that it is fully-attached to the parchment paper. You don’t want any holes. Swirl the meringue decoratively with a spatula or knife. This not only looks nice, but gives the meringue more surface area, which helps to insulate the ice cream underneath (yea for science!).

    Squeeze meringue out of the piping bag until it starts to come out rainbow. Pipe an arc of rainbow swirls across the top of the baked Alaska.

    Pipe another row of swirls on either side of the first to use up the remaining meringue (it will run out of color, but it still looks nice either way).

    Step:7

    Bake for 5 minutes, watching carefully the whole time. Remove the baked Alaska from the oven as soon as the peaks are browned.

    If you used a rimless baking sheet, you can carefully slide the baked Alaska onto a serving platter. Serve immediately and freeze leftovers in airtight containers.

    Enjoy!

    Frequently Asked Questions

    Q: What is a baked Alaska?
    A baked Alaska is a classic dessert consisting of ice cream placed on a cake base and completely covered in meringue which is then briefly baked in a very hot oven. The meringue acts as insulation keeping the ice cream frozen while the outside browns in the oven.

    Q: How does the ice cream not melt in the oven?
    The thick layer of meringue surrounding the ice cream acts as an insulator. Meringue is mostly air which is an excellent insulator against heat. As long as the meringue completely seals the ice cream with no gaps and the baking time is kept to just 5 minutes the ice cream stays frozen inside.

    Q: Can I use store bought ice cream instead of homemade?
    Absolutely. Use any good quality peppermint ice cream. Soften it slightly then pack it firmly into your plastic wrap lined bowl and refreeze until completely hardened before assembling. This shortcut saves hours without sacrificing any of the wow factor.

    Q: Can I make baked Alaska ahead of time?
    You can assemble the unbaked baked Alaska up to 2 days ahead and keep it in the freezer. Add the meringue coating and bake on the day you plan to serve it. Never bake it ahead — serve immediately from the oven.

    Go Checkout My Latest Blogs

    Thor’s Mint Chocolate Baked Alaska - Easy Baking Tips -Mastery Guide For Baking- Pro Tips For Beginner Bakers

    Thor’s Mint Chocolate Baked Alaska

    A showstopping three-layer dessert inspired by Thor — chocolate Genoise
    Prep Time 1 hour
    Cook Time 20 minutes
    Total Time 9 hours 20 minutes
    Servings: 8

    Ingredients
      

    For the Peppermint Ice Cream
    • 2 supa heavy cream
    • 1 sup whole milk
    • cup granulated sugar
    • tsp salt
    • 6 egg yolks
    • ½–1 tsp peppermint extract, to taste
    For the Coffee Chocolate Genoise Sponge Cake
    • 2 tbsp unsalted butter
    • ¼ cup + ½ tbsp cake flour
    • unsweetened cocoa powder
    • 1 tbsp instant coffee granules
    • 3 large eggs, room temperature
    • ½ cup granulated sugar
    • ½ tsp vanilla extract
    For the Soft Meringue Topping
    • 2 tbsp cornstarch
    • 2 tbsp granulated sugar
    • cup water
    • 8 egg whites, room temperature
    • 1 tsp vanilla extract
    • ½ tsp cream of tartar
    • 1 cup powdered sugar

    Method
     

    Make the Peppermint Ice Cream
    1. If using a standard ice cream maker, freeze the bowl for at least 12 hours before churning
    2. In a medium bowl, whisk the egg yolks until smooth. Set aside
    3. In a medium saucepan, whisk together the heavy cream, milk, sugar, and salt. Bring to a simmer and cook, whisking constantly, until the sugar is fully dissolved, about 5 minutes
    4. Slowly pour about one third of the hot cream mixture into the egg yolks, whisking quickly the whole time. Whisk in the remaining cream mixture, then return everything to the saucepan
    5. Heat over medium, stirring continuously, until thick enough to coat the back of a spoon
    6. Stir in the peppermint extract and green food coloring if using. Strain through a fine-mesh strainer into a heatproof bowl and cool to room temperature
    7. Press plastic wrap directly onto the surface of the ice cream base and refrigerate for at least 4 hours
    8. Line a large bowl completely with plastic wrap, letting it hang over the edges by about 1 inch. Churn the ice cream base according to your ice cream maker's directions, then scrape into the prepared bowl. Smooth the top and freeze for at least 4 hours until hardened
    Make the Chocolate Genoise Sponge Cake
    1. Preheat oven to 350°F. Line the bottom of a 9-inch cake pan with parchment paper. Melt the butter in a small saucepan and set aside
    2. In a medium bowl, whisk together the cake flour, cocoa powder, and instant coffee granules until well mixed and aerated
    3. Fill a large skillet halfway with water and bring to a simmer. In a heatproof bowl, whisk together the eggs and sugar. Set the bowl over the simmering water and whisk continuously until the mixture is warm to the touch
    4. Transfer to a stand mixer and beat with the whisk attachment until the mixture approximately triples in volume, about 5 minutes. When you lift the whisk, a continuous ribbon of batter should fall back into the bowl
    5. Sprinkle one third of the flour mixture over the batter and gently fold in with a rubber spatula until fully incorporated. Repeat twice with the remaining flour
    6. Pour about ¾ cup of the batter into the hot melted butter and fold together until smooth. Scrape the butter mixture back into the main batter and fold until well combined
    7. Scrape batter into the prepared cake pan and bake for about 15 minutes, until the cake pulls away from the edges and the center springs back when lightly pressed
    8. Cool in the pan for 10 minutes, then run a knife around the edge, flip onto a wire rack, and peel off the parchment. Cool completely
    Assemble the Baked Alaska
    1. Once the cake is completely cool and the ice cream is fully frozen, press the cake top-side down into the bowl on top of the ice cream. It should fit snugly — if the cake is slightly too big, carefully trim the edges. Return the bowl to the freezer while you make the meringue
    2. Preheat oven to 450°F. Line a rimless baking sheet with parchment paper. If you only have a rimmed sheet, use it upside down very carefully
    Make the Meringue Topping
    1. Optional rainbow decoration: prepare a 12-inch piping bag with a small star tip. Using a clean paintbrush, paint 2–3 inch stripes of each rainbow color inside the bag up to the tip edge. Set aside in a tall glass
    2. In a small saucepan, stir together the cornstarch, granulated sugar, and water. Bring to a boil over medium heat, stirring quickly and continuously. Cook for 15 seconds until a thick paste forms. Remove from heat and cover
    3. In a stand mixer, beat the egg whites until foamy. Add the vanilla extract and cream of tartar and beat on medium speed until soft peaks form
    4. Reduce to the lowest speed and add the powdered sugar one tablespoon at a time, making sure each addition is fully incorporated. Increase to high speed and beat until stiff, glossy peaks form
    5. Reduce to the lowest speed again and add the cornstarch paste one tablespoon at a time. Increase to medium and beat for 10 seconds
    Toast and Serve
    1. Fill the prepared piping bag halfway with meringue and twist the top shut
    2. Remove the ice cream and cake from the freezer and carefully turn it out onto the prepared baking sheet. Remove and discard the plastic wrap
    3. Spread the remaining meringue all over the ice cream and cake, ensuring it is fully attached to the parchment paper with no gaps or holes. Swirl decoratively with a spatula — this adds surface area and helps insulate the ice cream underneath
    4. Pipe an arc of rainbow swirls across the top using the prepared piping bag, squeezing until the colors appear. Add additional rows of swirls on either side to use up the remaining meringue
    5. Bake for 5 minutes, watching the entire time. Remove from the oven as soon as the meringue peaks are golden brown
    6. Carefully slide onto a serving platter if using a rimless sheet. Serve immediately. Freeze any leftovers in airtight containers

    Notes

    Freeze your ice cream maker bowl at least 12 hours ahead — overnight is easiest. The ice cream base also needs at least 4 hours to chill before churning, and another 4 hours to harden after. Plan this as a two-day project for the best results. You can shortcut this recipe by using store-bought peppermint ice cream and a boxed chocolate cake — no judgment. Make sure the meringue fully covers the ice cream with no gaps; this insulates it from the oven heat. Watch the oven closely during the final 5-minute bake — it goes from perfect to over-browned very quickly.