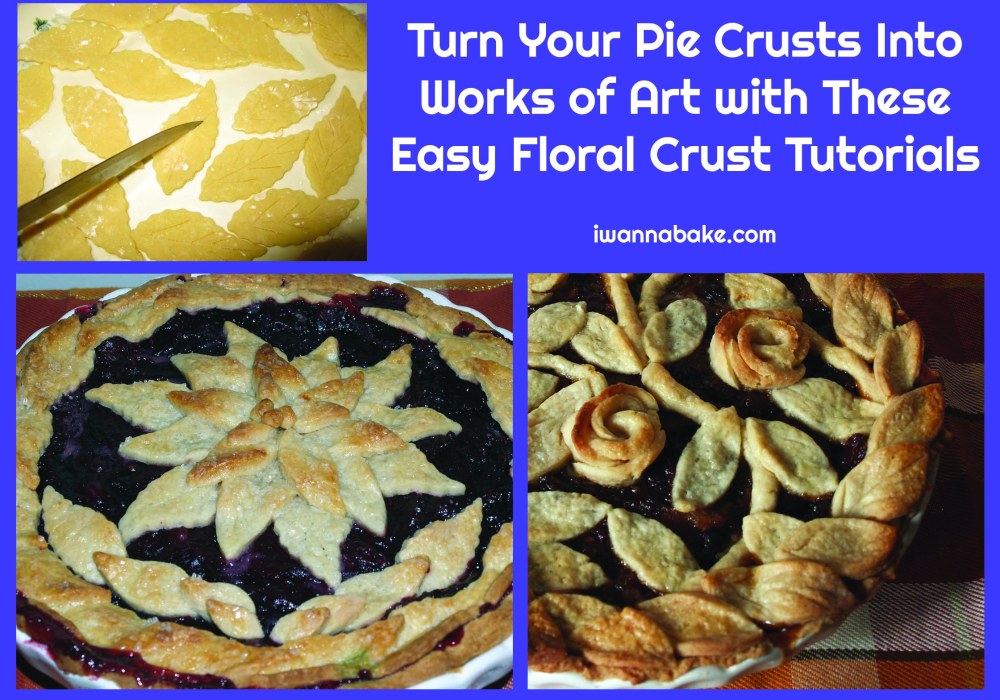
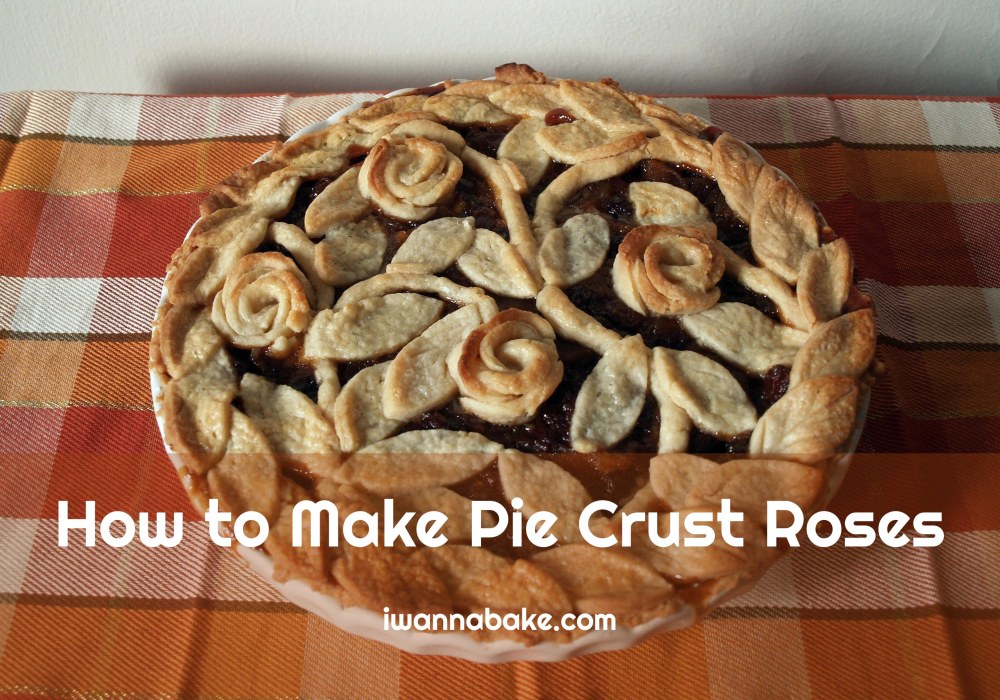
Today, I bring you part two in my pie crust embellishment series. This one is probably my personal favorite: roses! These look really impressive, but as was the case with leaf borders, they’re deceptively easy to make.
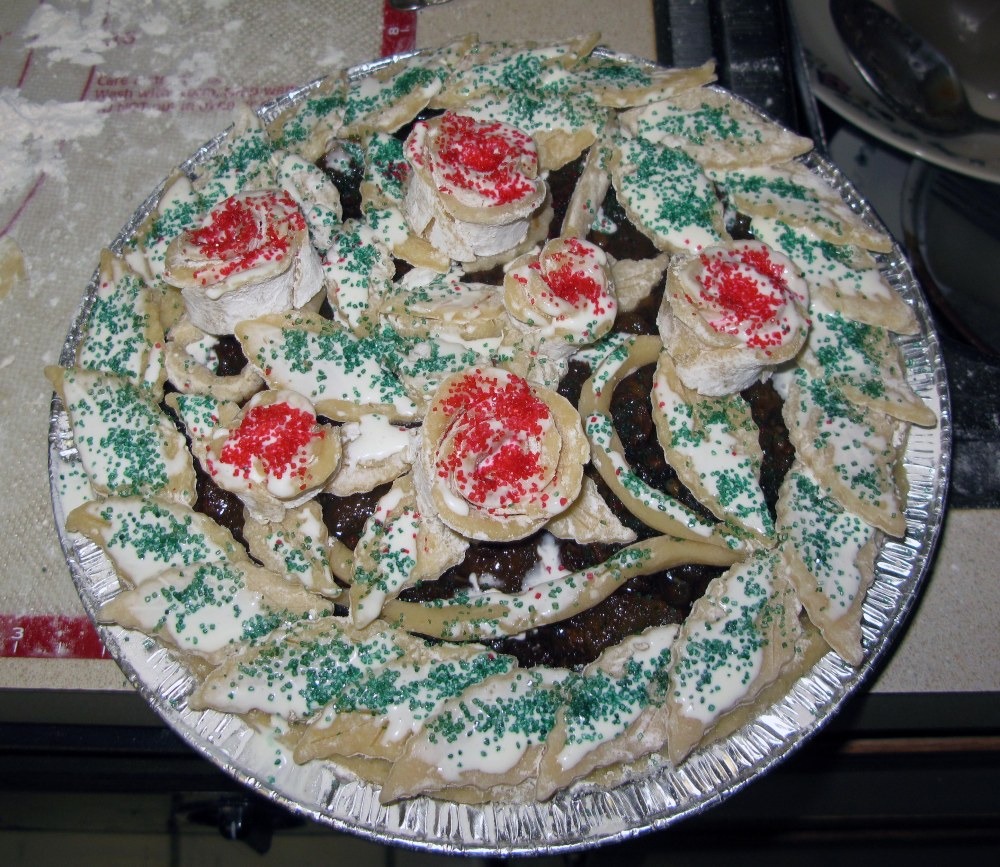
Seriously, all this takes is 5 circles cut out of a pie crust, a few drops of water, two cuts, and a little finessing. You can use the roses on their own, or you can add some leaves, vines, and/or different-sized roses to add an extra level of fanciness. I’ve also tried using colored sugar to make my roses red and my leaves green with some success.
Once again, I’ll urge you to use homemade pie crust for this, but if you’re pressed for time or just don’t feel like dealing with it, you can use store-bought pie crust just fine. You might need an extra roll if you’re making a full arrangement with leaves and vines like I did, but you might be able to get by with just one if you’re careful with your scraps.
For Pie Crust Roses You will need the following ingredients/supplies:
- ½ recipe sweet pie crust or 1 roll store-bought pie crust (you will need more for the bottom crust)
- heavy cream (optional)
- decorating or colored sugar (optional)
- circular cookie cutter or drinking glass
- sharp knife
- waxed or parchment paper
Line a cookie sheet or large plate with waxed paper and set it aside.
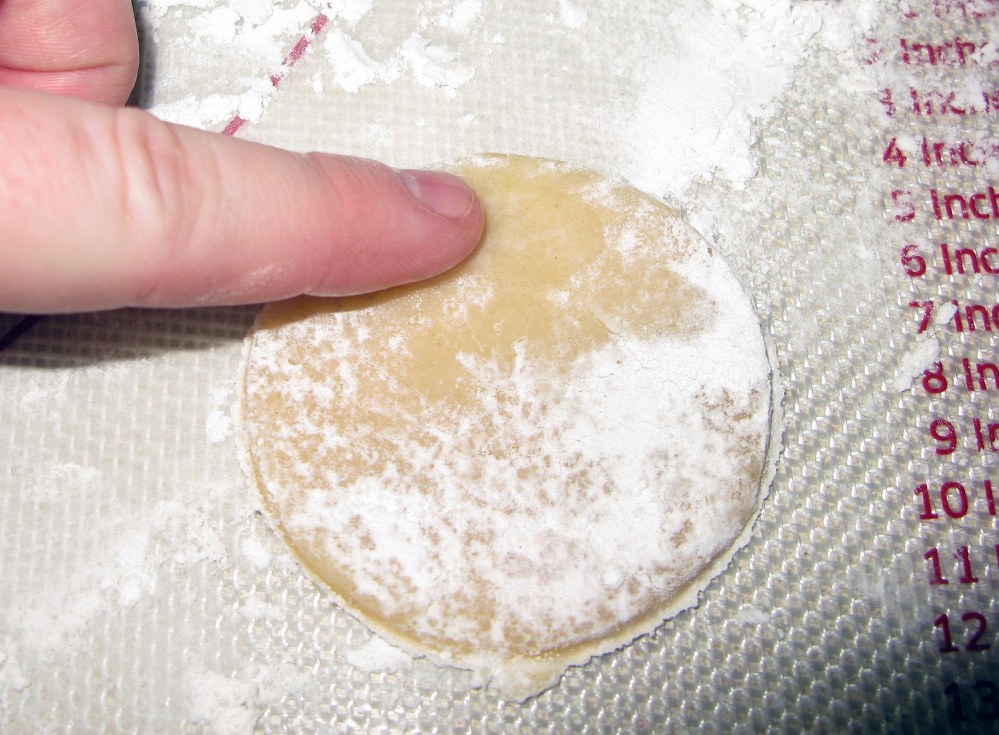
On a lightly-floured surface, roll out your pie crust until it’s about ⅛”-¼” thick.
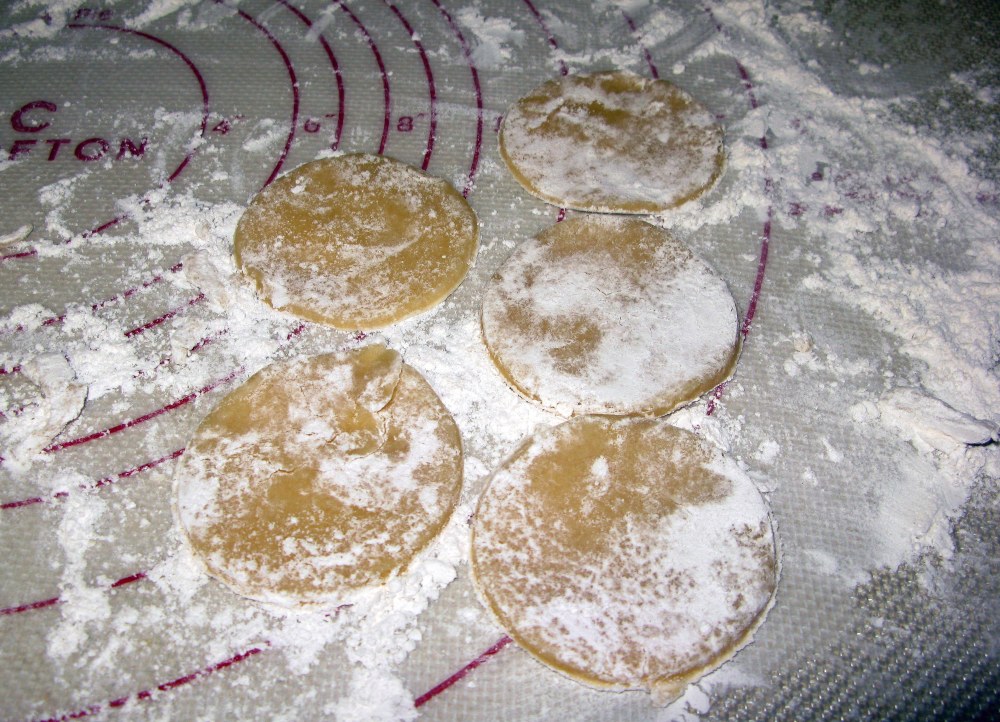
Cut 5 circles of crust for each two roses you will need (I like to use 4 or 5 roses, so 10-15 circles). Dust off as much flour as possible. You can use any excess dough to make leaves and vines.
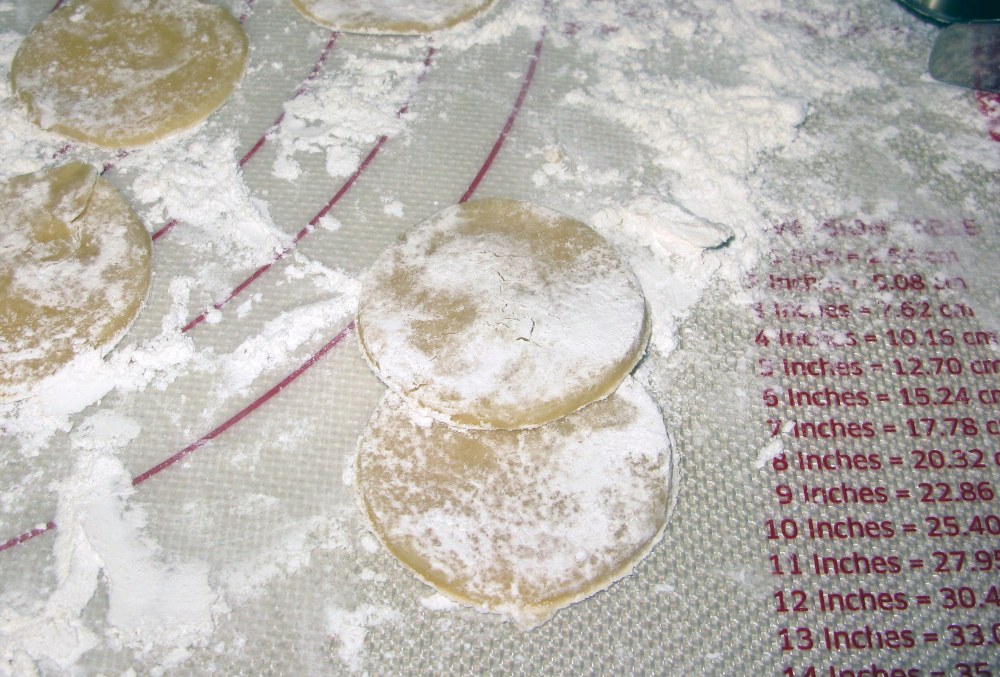
Dip your finger in some water and wet the top of one circle of dough.
Place another circle on top of the wet part and gently press it down, overlapping approximately ⅓ of the first circle.
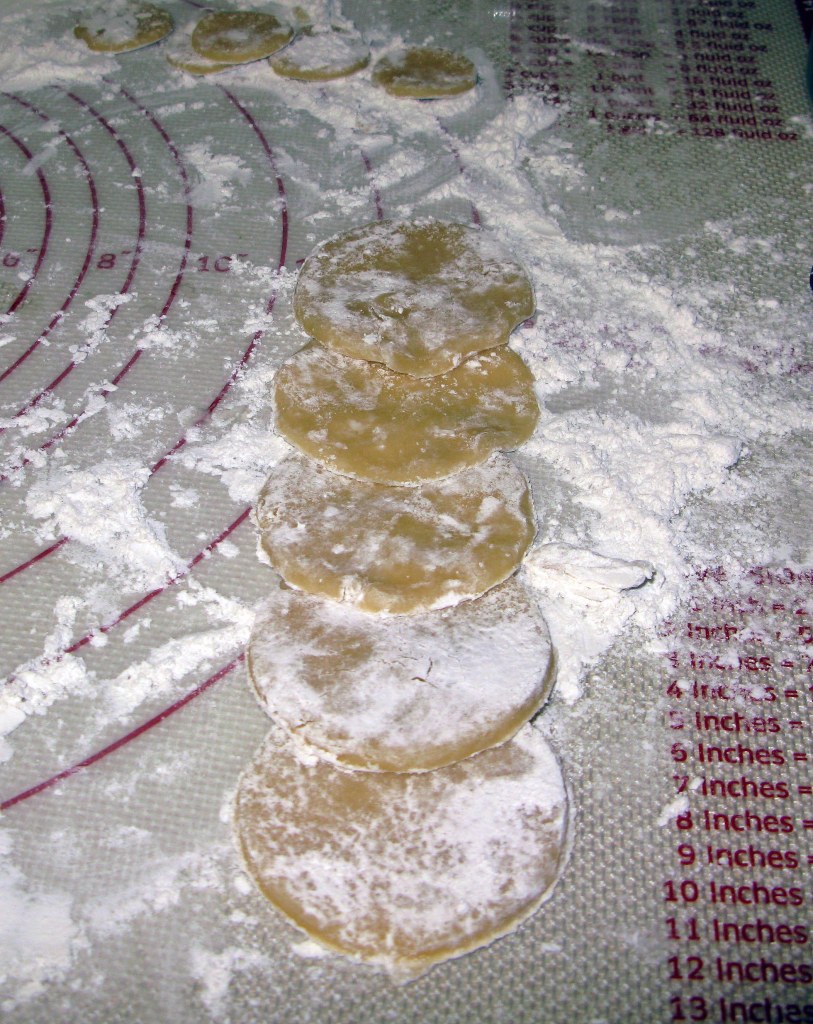
Repeat the process with the remaining three dough circles until you have a chain 5 circles long.
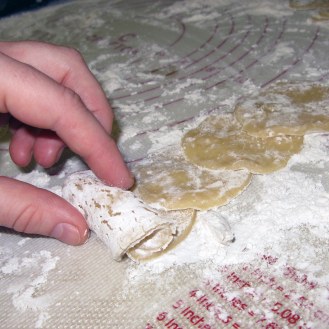
Starting from the end closest to you, roll the dough circles up into a tube. When you reach the end of the roll, wet the end of the last dough circle before pressing it against the roll to seal it.
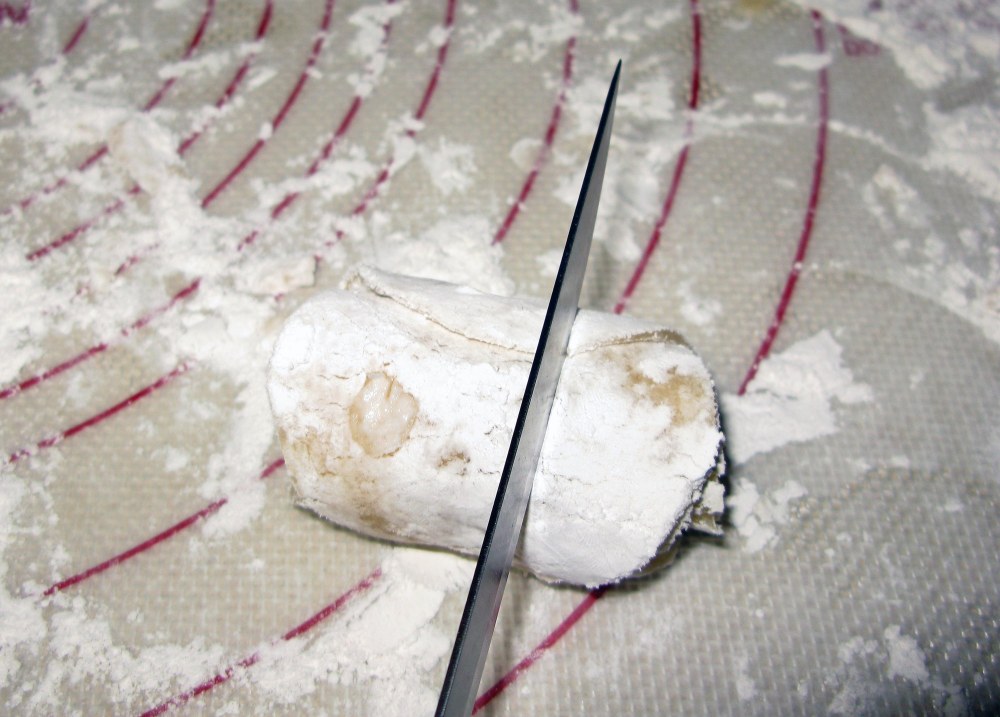
Using a sharp knife, slice off one end of the roll a little bit off-center. The piece you cut off should be a bit more than a third of the width of the entire roll.
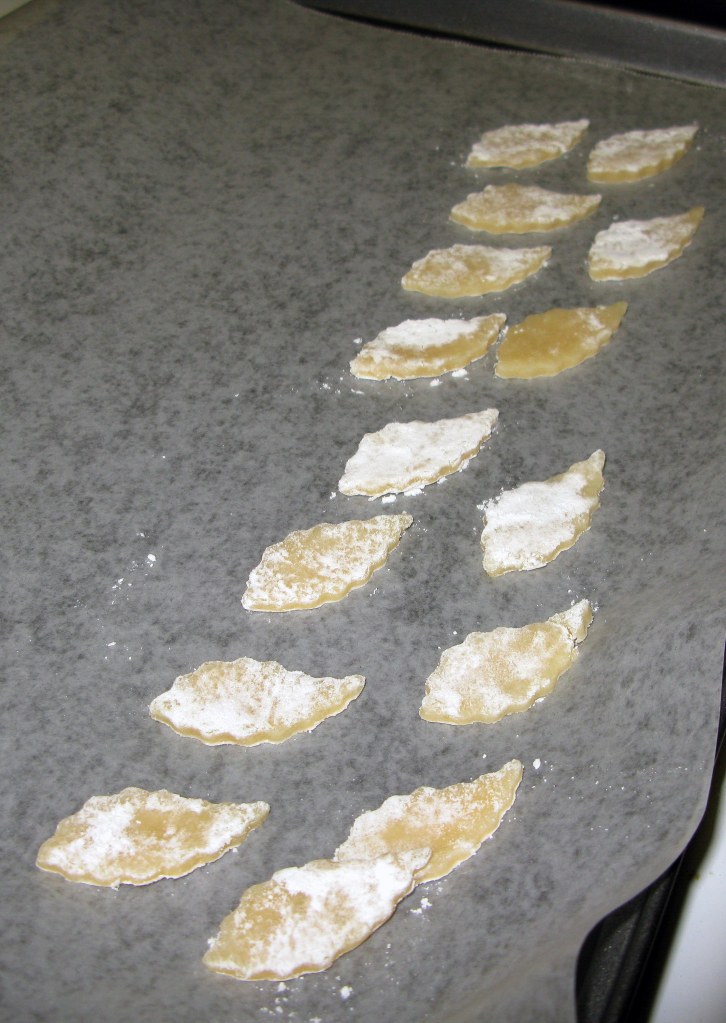
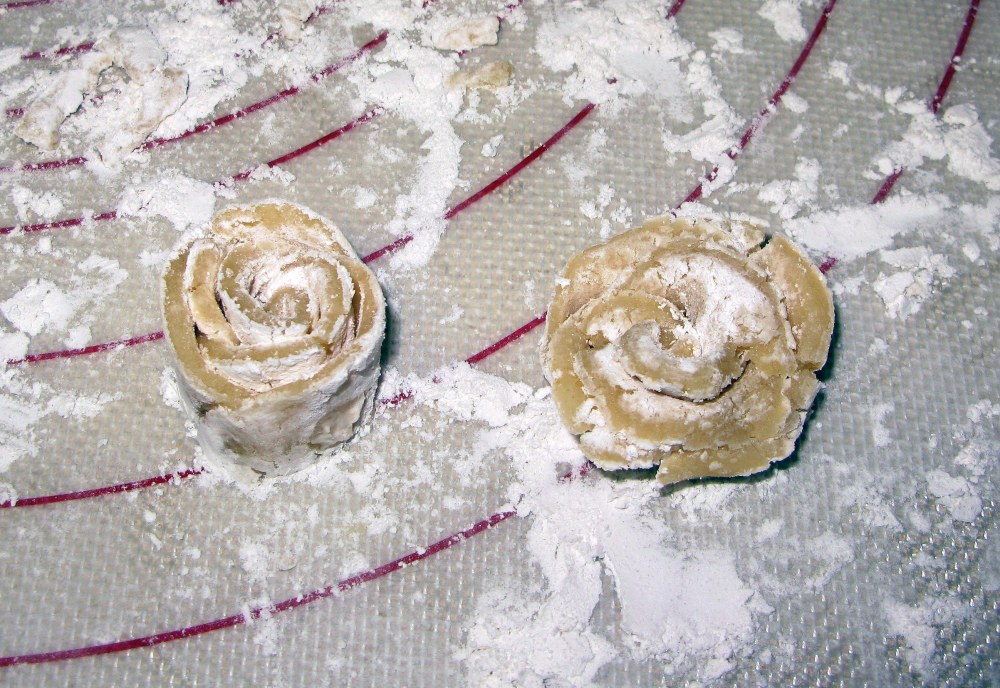
Repeat on the other side of the roll. Stand your two pieces up on their cut ends and gently flare the petals.
Carefully transfer your roses to the lined cookie sheet and refrigerate them for at least half an hour before use.
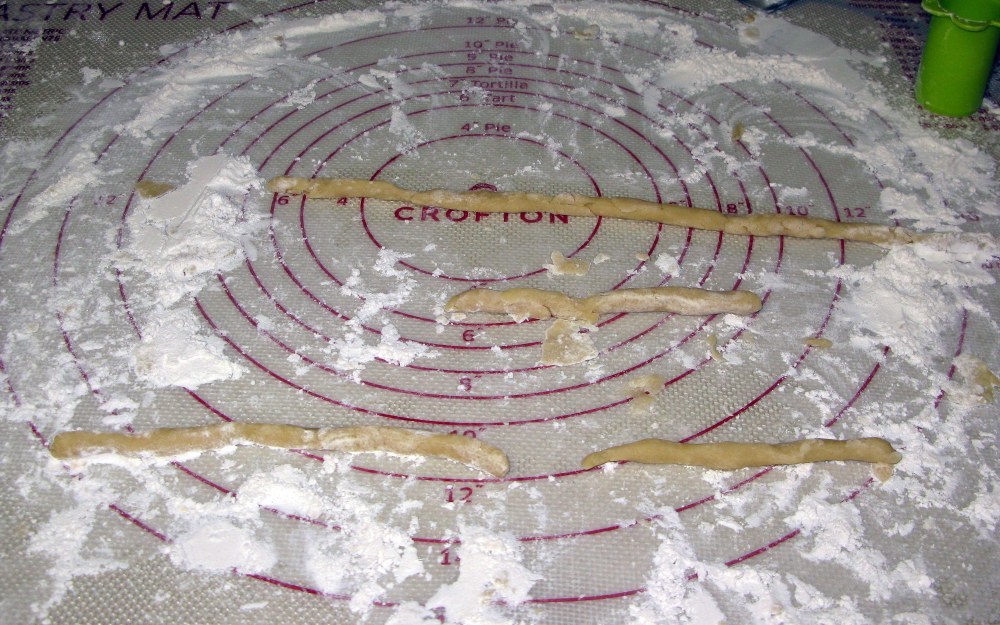
Meanwhile, gather together any remaining crust scraps and mush them together. Roll the ball into a rope about as thick as a pencil. The rope will likely break as you go, but that’s ok. You can either pinch the pieces back together or use them separately for different branches of vine.
Refrigerate your vine pieces long enough to prevent them from stretching and tearing too much when you place them.
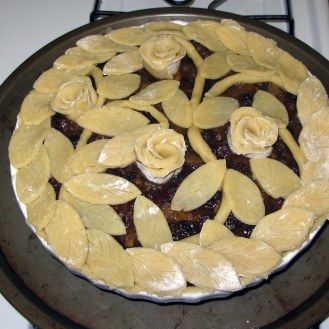
When you’re ready to assemble your pie, take everything out of the fridge. First, arrange your vines as you like.
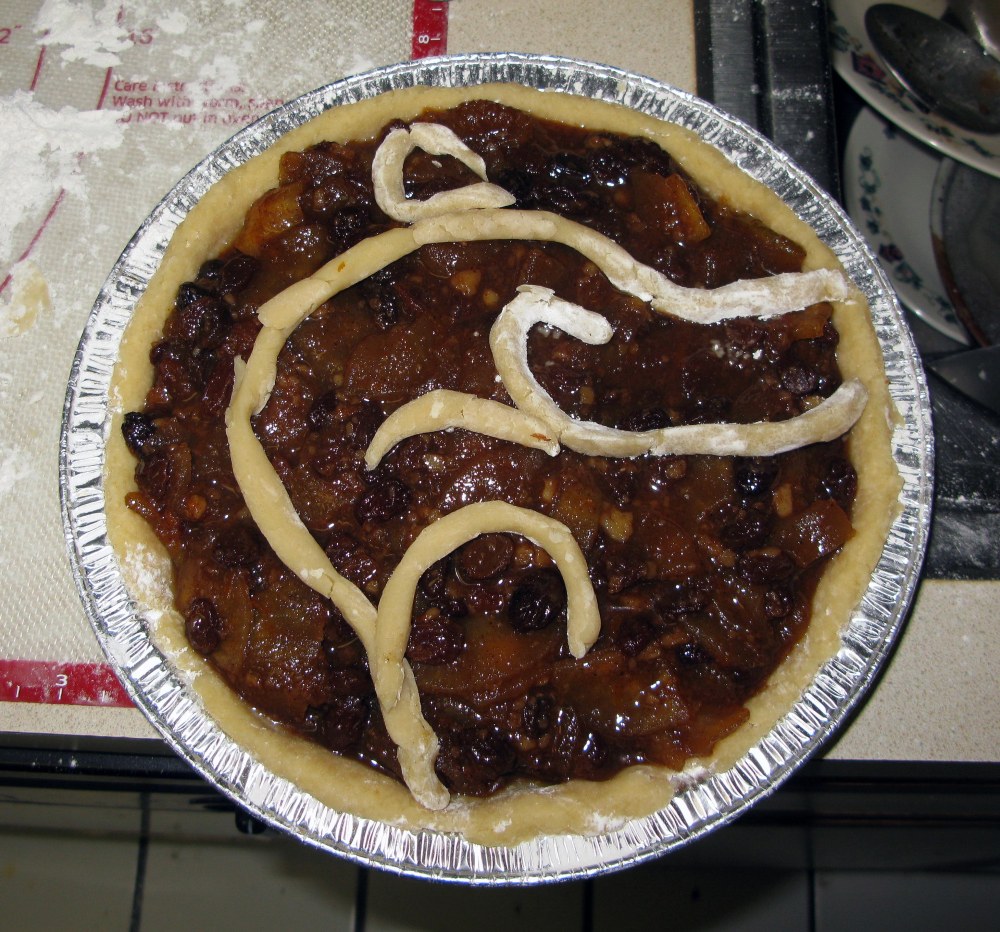
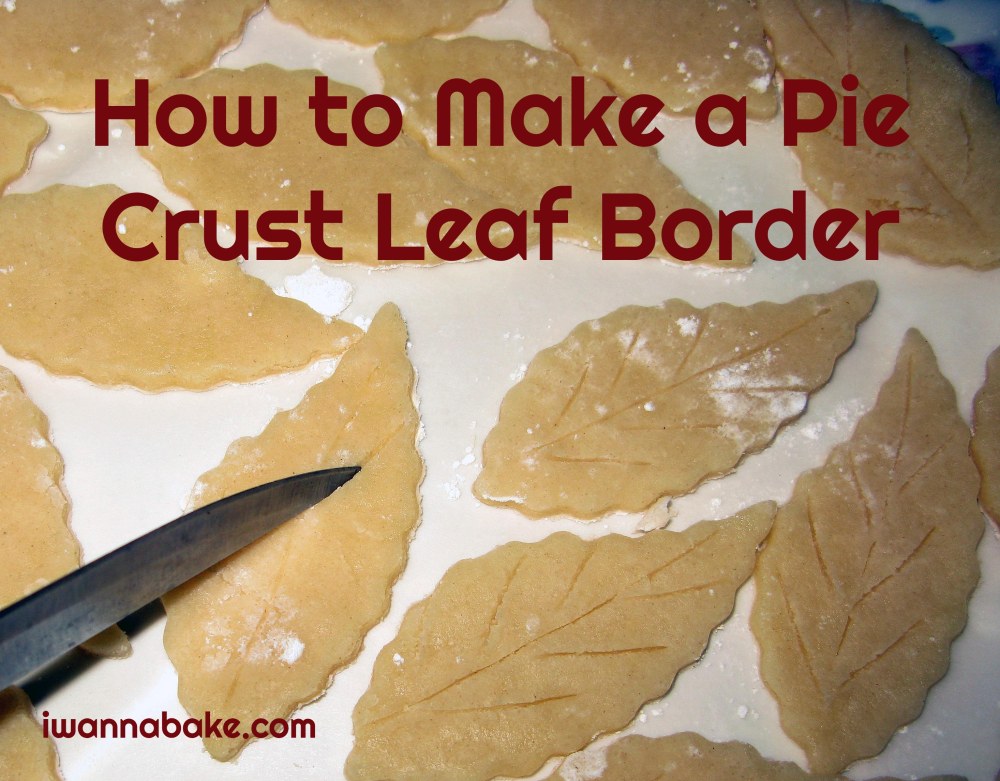
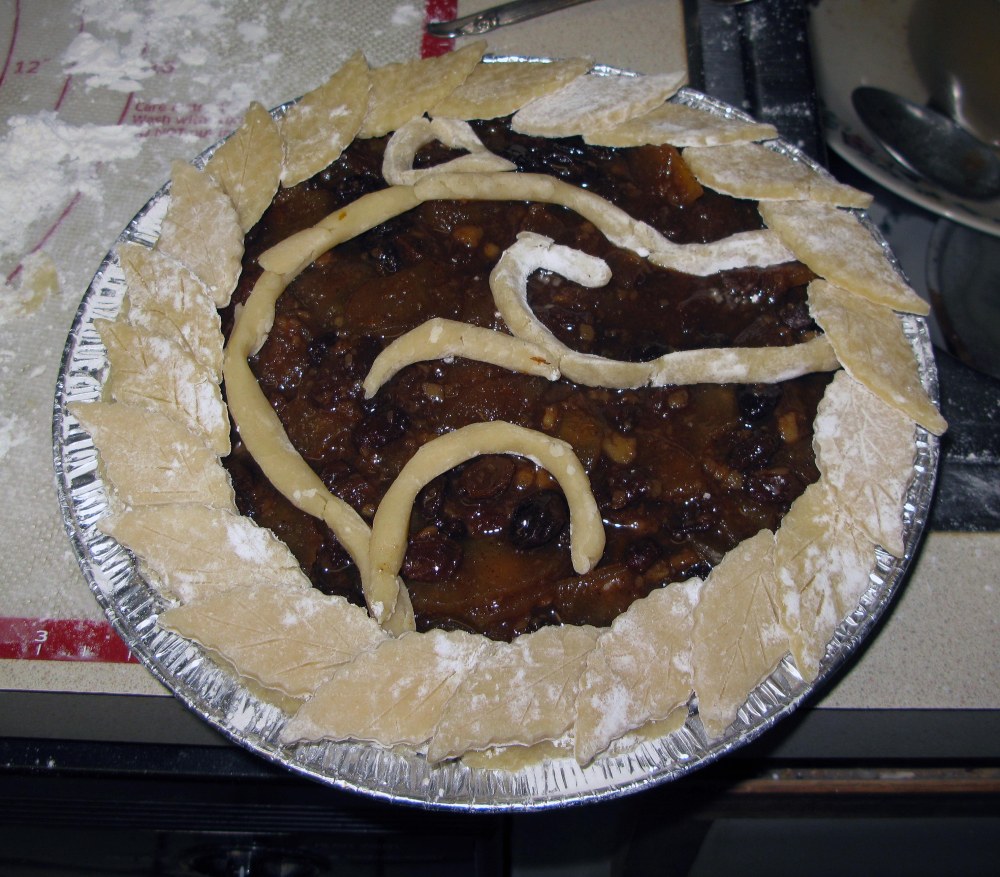
If you are adding a leaf border, add it on now so that you can adjust your vine as needed.
Now place your roses. I like to put them at the ends of the vines, but really, it’ll look nice as long wherever you place them.
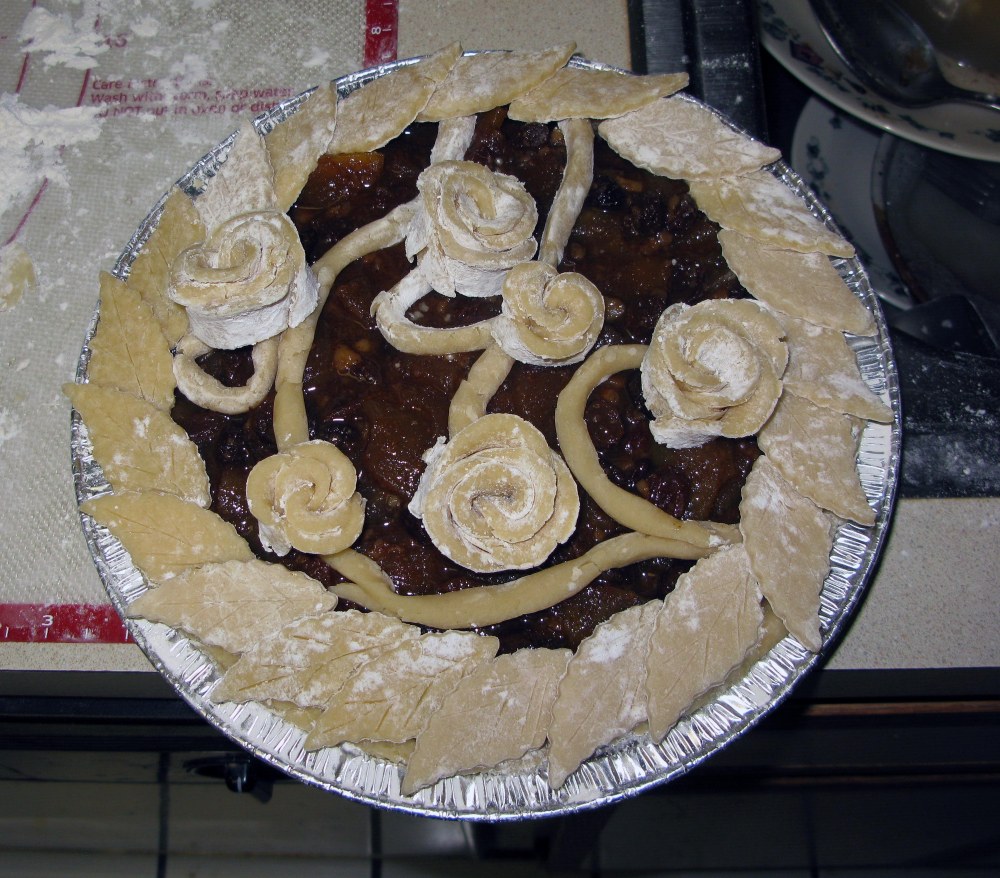
Finally, add in some extra leaves to fill out your design and cover more of the pie filling (here are a few different examples).
Put the pie back in the fridge while your oven preheats. This will help maintain the shapes of your crust pieces. If they’re too warm, they will melt and burn.

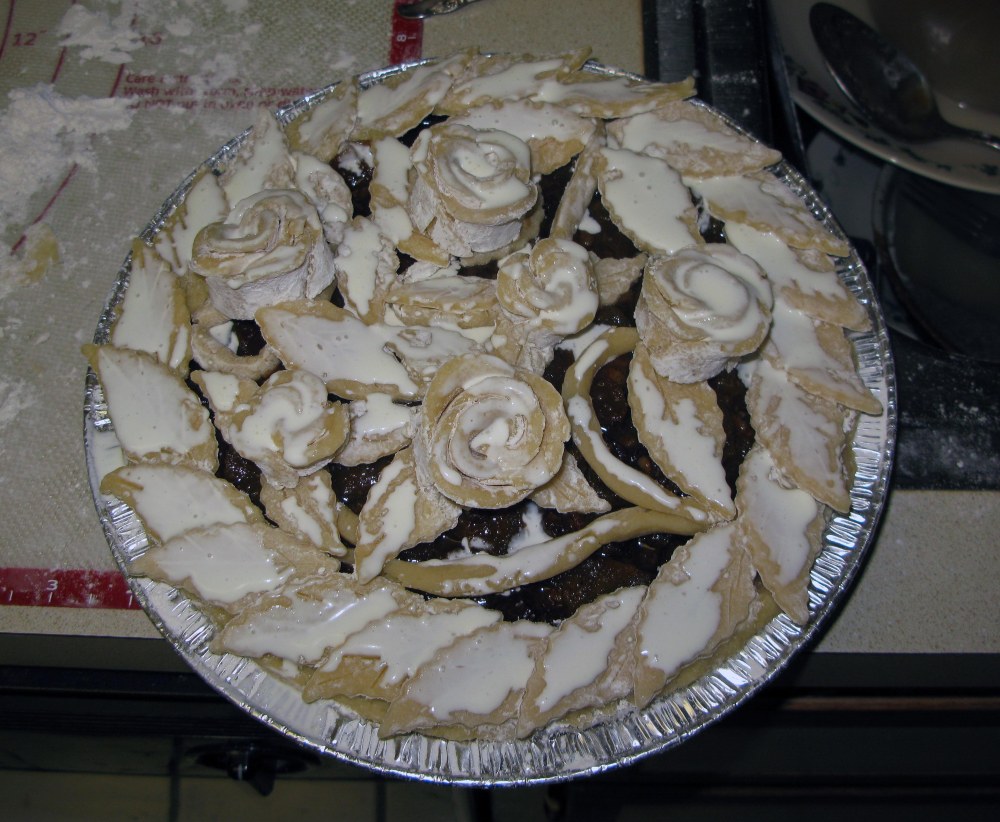
When your oven gets up to temperature, take the pie out again and brush the top crust with heavy cream. Adjust the pieces as needed, as they will inevitably shift during this part. Sprinkle with decorating sugar if you want a little sparkle and crunch (or used colored sugar if you want to try something different).
Bake the pie as directed, checking after 30 minutes to make sure the roses and leaves aren’t browning too quickly. If they are, cover the browning parts of the crust with foil for the remainder of the baking time.
That’s all there is to it. Now go forth and decorate some pies!

Subscribe to Blog via Email
Enter your email address to subscribe to this blog and receive notifications of new posts by email.
Share this:
- Welcome to I wanna bake
- How to Make Pie Crust Roses
- Unicorn Poop Cookies
- Turn Your Pies Into Works of Art with These Easy Floral Crust Tutorials
- Povitica- Croatian Walnut Bread
How to Make Pie Crust Roses
Ingredients
Method
- Line a cookie sheet or large plate with waxed or parchment paper and set aside
- On a lightly floured surface, roll out the pie crust to about ⅛ to ¼ inch thick. Cut 5 circles of dough for every 2 roses you need — plan on 4 or 5 roses total so cut 10–15 circles. Dust off as much excess flour as possible. Save any scraps for leaves and vines
- Dip a finger in water and wet the top of one circle of dough. Place a second circle on top overlapping approximately one third of the first circle and press gently to adhere
- Continue wetting and overlapping until all 5 circles are connected in a chain
- Starting from the end closest to you, roll the chain of circles up tightly into a tube. When you reach the end, wet the last circle before pressing it against the roll to seal
- Using a sharp knife, slice off one end of the roll slightly off-center — the piece you cut off should be just over one third of the total width of the roll. Repeat on the other end. You will have two rose pieces
- Stand each piece up on its cut end and gently flare the petals outward with your fingers
- Carefully transfer the roses to the lined sheet and refrigerate for at least 30 minutes before using
- Gather remaining crust scraps and press together into a ball. Roll into a rope about as thick as a pencil. It may break as you roll — pinch pieces back together or use them separately as different vine branches
- Refrigerate the vine pieces until firm enough to handle without stretching or tearing
- When ready to assemble the pie, remove all pieces from the fridge. Arrange the vines on top of the filled bottom crust first, then add any leaf border, then place the roses at the ends of the vines or wherever desired. Fill in gaps with extra leaves
- Return the pie to the fridge while the oven preheats — keeping everything cold helps the shapes hold during baking
- When the oven is ready, remove the pie and brush the top crust with heavy cream. Gently adjust any pieces that shifted. Sprinkle with decorating or colored sugar if desired
- Bake the pie according to your pie recipe directions. Check after 30 minutes — if the roses or leaves are browning too quickly, cover those areas loosely with foil for the remainder of the bake time