Ingredients
Method
- STEP 1 : Mix Dry IngredientsIn a medium bowl combine flour, baking powder, salt, and cinnamon. Whisk together and set aside.
- STEP 2 : Cream Butter and SugarIn a large bowl or stand mixer cream butter and sugar together until light and fluffy. Beat in molasses, egg, vanilla, and bourbon until fully combined.
- STEP 3 : Combine Wet and Dry IngredientsAdd dry ingredients into wet ingredients half at a time. Stir until a soft dough forms.
- STEP 4 : Chill the DoughScrape dough onto plastic wrap and shape into a flat rectangle. Refrigerate for at least 1 hour or overnight.
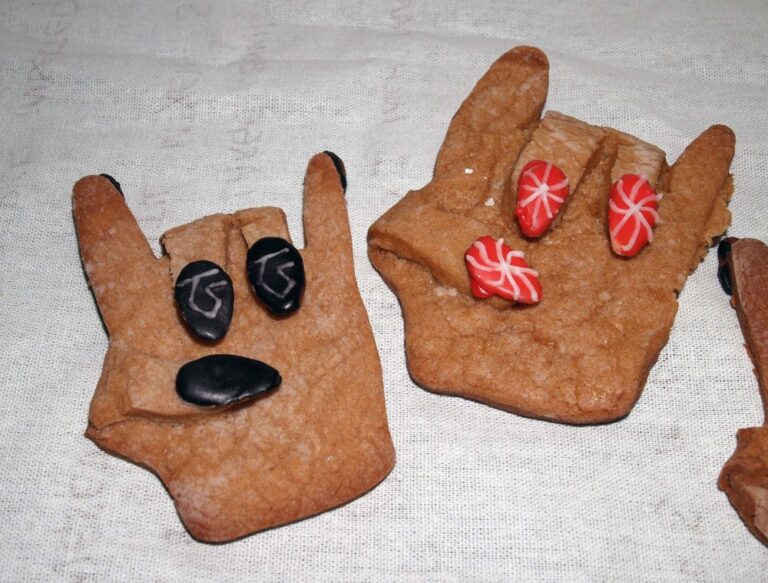
- STEP 5 : Prepare Almond FingernailsWhile dough chills select the most nail-shaped almond slices. Sort into sets of five per cookie.
- STEP 6 : Make the Royal IcingStir together powdered sugar, vanilla, and 2 tablespoons milk. Add more milk drop by drop until piping consistency is reached. Divide into portions and add gel food coloring to each.
- STEP 7 : Paint the Almond NailsSpread thin flood consistency icing onto one side of each almond slice using a toothpick. Dry completely on wax paper before adding designs.
- STEP 8 : Pipe Designs on NailsOnce base coat is fully dry pipe designs onto almond nails using piping consistency icing. Allow to dry completely on wax paper.
- STEP 9 : Cut and Shape CookiesPreheat oven to 350°F. Roll chilled dough on powdered sugar dusted surface. Cut into hand shapes using cookie cutter. Fold middle finger ring finger and thumb inward to form devil horns.
- STEP 10 : Bake the CookiesTransfer to lined baking sheet. Bake for 10 to 15 minutes until lightly golden. Cool on baking sheet for 5 minutes then transfer to wire rack.
- STEP 11: Attach the FingernailsOnce cookies are completely cool apply a drop of icing to the back of each almond nail. Press onto upward facing fingers first then flip and attach remaining nails. Allow to set completely.
Notes
Bourbon substitute:
Replace bourbon with 1 tablespoon of water or
leave it out entirely without affecting texture. Icing tip:
Make two separate bowls for each color — one
piping consistency and one flood consistency.
Never mix them or your designs will bleed. Black food coloring warning:
Wilton black gel coloring stains everything it
touches including your tongue and fingers. Use
sparingly and wash hands immediately. Finger cracking tip:
If cookie fingers crack when shaping simply press
dough back together gently. Chilling the dough
thoroughly before shaping reduces cracking. Make ahead:
Dough can be refrigerated overnight. Painted almond
nails can be made 1 to 2 days ahead and stored
on wax paper at room temperature.
Replace bourbon with 1 tablespoon of water or
leave it out entirely without affecting texture. Icing tip:
Make two separate bowls for each color — one
piping consistency and one flood consistency.
Never mix them or your designs will bleed. Black food coloring warning:
Wilton black gel coloring stains everything it
touches including your tongue and fingers. Use
sparingly and wash hands immediately. Finger cracking tip:
If cookie fingers crack when shaping simply press
dough back together gently. Chilling the dough
thoroughly before shaping reduces cracking. Make ahead:
Dough can be refrigerated overnight. Painted almond
nails can be made 1 to 2 days ahead and stored
on wax paper at room temperature.