Category: cake recipe

  • Meringue Pie Recipe

    Meringue Pie Recipe

    meringue pie recipe

    Meringue Pie Recipe (Easy 6-Inch Pie for Two)


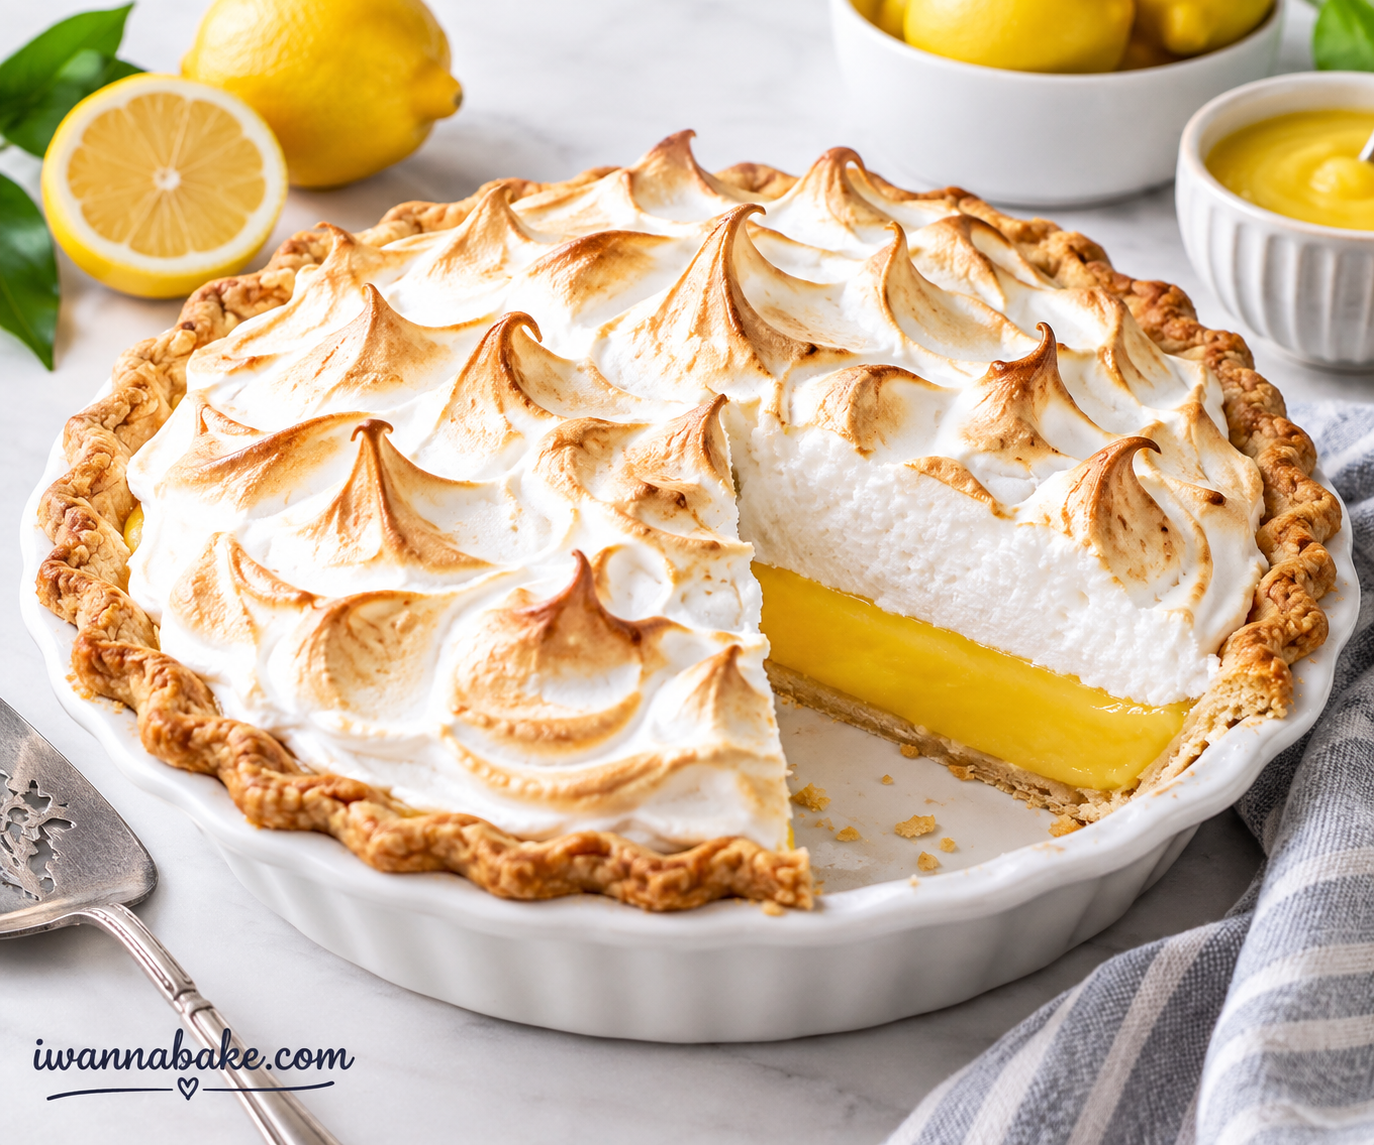
    If a whole 9-inch lemon meringue pie always leaves you with three-quarters of a pie going stale on the counter, this small lemon meringue pie recipe is the fix. It’s scaled down to fit a 6-inch pan, so you get a full pie experience — crisp buttery crust, silky-tart lemon filling, and a cloud of toasted meringue — without the leftovers problem. It’s also genuinely easier to get right than a full-size pie, because a smaller batch of filling cooks and sets more evenly, and a smaller meringue is less prone to weeping.
    This recipe is written for home bakers who want a dependable, from-scratch lemon meringue pie, not a shortcut version with instant pudding. Every step below explains what to look for, so even if you’ve never made meringue before, you’ll know exactly when it’s ready.

    Why You’ll Love This Small Lemon Meringue Pie

    ⦁ Perfectly portioned for two to four people, with no half-eaten pie in the fridge for a week.
    ⦁ Uses simple pantry staples — no condensed milk shortcuts or instant filling mixes.
    ⦁ Built-in tips prevent the two most common lemon meringue pie problems: weeping and shrinking.
    ⦁ Ready in under 2 hours, including chilling time.

    What You Need for This Small Lemon Meringue Pie Recipe

    Here’s a quick look at what goes into each component. Exact measurements are in the recipe card further down, along with the full instructions.

    For the Crust

    ⦁ All-purpose flour, salt, and a touch of sugar for a crisp, slightly sweet base.
    ⦁ Cold unsalted butter, cut into small cubes — cold butter is what makes the crust flaky.
    ⦁ Ice water, added a tablespoon at a time until the dough just comes together.

    For the Lemon Filling

    ⦁ Granulated sugar, cornstarch, and a spoonful of flour to thicken the filling and help it hold a clean slice.
    ⦁ Fresh lemon juice and zest — fresh is worth it here, since bottled juice tastes noticeably flatter.
    ⦁ Egg yolks, which give the filling its rich, custardy texture (the whites are saved for the meringue).
    ⦁ A little butter, whisked in at the end for shine and a smoother mouthfeel.

    For the Meringue

    ⦁ Egg whites at room temperature, which whip up taller and more stable than cold ones.
    ⦁ Cream of tartar, to stabilize the egg whites and help prevent weeping.
    ⦁ Granulated sugar, added gradually so the meringue turns glossy instead of grainy.

    How to Make a Small Lemon Meringue Pie

    Step 1: Make and Blind Bake the Crust

    Step 1: Make and Blind Bake the Crust
    Cut the cold butter into the flour mixture until it looks like coarse, pea-sized crumbs — you should still see small flecks of butter, since those are what create flaky layers in the oven. Add ice water just until the dough holds together when you squeeze it; too much water makes a tough crust. Chill the dough, then roll it out, fit it into your pan, and blind bake it (with pie weights) until it’s light golden all over, including the bottom. A fully baked crust is what keeps this pie from turning soggy.

    Step 2: Cook the Lemon Filling

    Whisk the sugar, cornstarch, flour, and salt together before adding any liquid — this prevents lumps. Cook the mixture over medium heat, whisking constantly, until it thickens enough to coat the back of a spoon and starts to bubble gently. Temper the egg yolks by whisking in a little of the hot mixture first, then stir them back into the pan and cook for two more minutes. The filling is ready when it’s thick enough to hold a line when you drag a spoon through it.

    Step 3: Whip the Meringue

    Beat the room-temperature egg whites with cream of tartar until foamy, then add the sugar one tablespoon at a time. Keep beating until the meringue holds stiff, glossy peaks that stand straight up when you lift the beaters. If the meringue looks dull or grainy, it needs more time — this step can’t be rushed.

    Step 4: Assemble, Bake, and Cool

    Pour the hot filling into the baked crust right away, then immediately spread the meringue over the top while the filling is still hot. Make sure the meringue touches the crust all the way around the edge — this seals in the filling and is the single biggest factor in preventing shrinkage. Bake just until the peaks turn golden, then cool the pie fully before slicing so the filling has time to set.

    Expert Tips for a No-Weep Meringue

    ⦁ Whip the egg whites to true stiff peaks — the meringue should stand up straight and not flop over when you lift the beaters.
    ⦁ Dissolve the sugar fully; rub a bit of meringue between your fingers, and it should feel smooth, not gritty.
    ⦁ Always spread meringue over hot filling, never over a cooled or chilled filling.
    ⦁ Seal the meringue to the crust on all sides — any exposed filling edge is where shrinking starts.
    ⦁ Avoid making meringue pie on a very humid day if possible, since humidity encourages weeping.

    Common Mistakes to Avoid

    ⦁ Skipping the blind bake, which leads to a soggy, undercooked bottom crust.
    ⦁ Not cooking the filling long enough, which results in a pie that won’t slice cleanly.
    ⦁ Using cold or under-whipped egg whites, which produces a flat, weepy meringue.
    ⦁ Refrigerating the pie before the meringue has cooled slightly at room temperature, which can cause condensation.

    Ingredient Substitutions

    This table can help if you’re missing an ingredient or want a slightly different result.

    IngredientPossible SubstituteEffect on Result
    Fresh lemon juiceBottled lemon juiceStill works, but flavor is slightly flatter and less bright
    Unsalted butter (crust)Cold vegetable shorteningFlakier crust with a milder flavor
    CornstarchAll-purpose flour (use double the amount)Filling sets softer and slightly less glossy
    Cream of tartar1/2 teaspoon lemon juiceSimilar stabilizing effect on the meringue
    Granulated sugar (meringue)Superfine sugarDissolves faster for a smoother, glossier meringue

    Variations to Try

    ⦁ Graham cracker crust: swap the pastry crust for a pressed graham cracker crust for a no-fuss, no-blind-bake option.
    ⦁ Berry swirl: dot the filling with a spoonful of raspberry jam before adding the meringue for a fruity twist.
    ⦁ Whipped cream topping: skip the meringue entirely and top the chilled pie with lightly sweetened whipped cream instead.
    ⦁ Key lime version: replace the lemon juice and zest with lime juice and zest for a small key lime meringue pie.

    Serving Suggestions

    Serve this pie well chilled, sliced into wedges with a warm knife (wipe it between cuts for clean slices). A few curls of lemon zest on top make a nice finishing touch, and it pairs well with a cup of tea or coffee for an afternoon treat.

    How to Store and Freeze

    Cover the pie loosely and refrigerate for up to 3 days. The meringue is at its best on the first and second day, since it will slowly weep a little moisture over time — this is normal for meringue-topped pies. Meringue does not freeze well, so this pie isn’t a great candidate for freezing once assembled. If you’d like to prep ahead, the baked crust can be made up to 2 days in advance and stored at room temperature in an airtight container.

    Troubleshooting

    ProblemLikely CauseFix
    Meringue weeps (watery beads)Egg whites under-whipped or filling not hot enoughWhip to full stiff peaks; spread meringue on hot filling right away
    Meringue shrinks from the crustMeringue was spread on a cooled filling, or didn’t touch the edgesAlways seal meringue to the crust all the way around while filling is hot
    Soggy bottom crustCrust wasn’t fully blind bakedBake the empty crust until golden all over, including the base, before filling
    Filling is runny after chillingFilling wasn’t cooked long enough on the stoveBake the empty crust until golden all over, including the base, before filling

    Frequently Asked Questions

    Why is my lemon meringue pie runny?

    This almost always means the filling wasn’t cooked long enough. It needs to visibly thicken and gently bubble on the stove — if it still looks thin when you remove it from the heat, it won’t set properly once cooled.

    Can I make this small lemon meringue pie ahead of time?

    You can bake the crust up to 2 days ahead and store it at room temperature. The filling and meringue, however, are best made and baked the same day you plan to serve the pie, since the meringue softens over time.

    Can I use bottled lemon juice instead of fresh?

    Yes, in a pinch. The pie will still set correctly, but the flavor will be noticeably less bright than with fresh lemon juice and zest.

    Can I make this recipe in a regular 9-inch pie pan?

    This recipe is scaled for a 6-inch pan. To make a standard 9-inch pie, roughly double all of the ingredients and expect a slightly longer bake time for the crust and meringue.

    Why did my meringue turn watery on top after a day in the fridge?

    A little weeping over time is normal for meringue-topped pies, especially in humid conditions. To minimize it, make sure the meringue was fully whipped to stiff peaks and spread over hot filling, and serve the pie within a day or two.

    Related Recipes on iwannabake.com

    ⦁ Small Batch Lemon Bars
    ⦁ Homemade Lemon Curd From Scratch
    ⦁ Small Batch Key Lime Pie
    ⦁ No-Weep Meringue: Tips for Any Meringue Pie
    ⦁ Small Batch Chocolate Chip Cookies

    Slice of small lemon meringue pie with golden toasted meringue on a white plate
    iwannabake.com

    Meringue Pie (Easy 6-Inch Pie for Two)

    A small, from-scratch lemon meringue pie with a buttery crust, silky-tart lemon filling, and fluffy toasted meringue. Perfectly portioned for two to four servings — no leftovers to worry about.
    Prep Time 25 minutes
    Cook Time 30 minutes
    Total Time 1 hour 30 minutes
    Course: Basics, Dessert
    Cuisine: American
    Calories: 290

    Ingredients
      

    Crust
    • 3/4 cup (95g) all-purpose flour
    • 1/4 teaspoon salt
    • 1/2 teaspoon granulated sugar
    • 5 tablespoons (70g) cold unsalted butter, cubed
    • 2–3 tablespoons ice water
    Lemon Filling
    • 2/3 cup (135g) granulated sugar
    • 2 tablespoons (16g) cornstarch
    • 1 tablespoon (8g) all-purpose flour
    • Pinch of salt
    • 3/4 cup (180ml) water
    • 2 large egg yolks (reserve the whites for the meringue)
    • 1/3 cup (80ml) fresh lemon juice, about 2 medium lemons
    • 1 teaspoon lemon zest
    • 2 tablespoons (28g) unsalted butter
    Meringue
    • 2 large egg whites, room temperature
    • 1/4 teaspoon cream of tartar
    • 1/4 cup (50g) granulated sugar
    • 1/2 teaspoon vanilla extract

    Method
     

    1. 1. Make the crust: In a bowl, whisk together the flour, salt, and sugar. Cut in the cold butter with a pastry cutter or your fingers until the mixture looks like coarse crumbs with pea-sized butter pieces. Add ice water one tablespoon at a time, mixing just until the dough comes together. Shape into a disk, wrap, and chill for 30 minutes.
      2. Roll the chilled dough on a lightly floured surface and fit it into a 6-inch pie or tart pan. Trim and crimp the edges, then prick the bottom all over with a fork. Chill for another 15 minutes.
      3. Preheat the oven to 375°F (190°C). Line the crust with parchment paper and fill with pie weights (or dried beans). Blind bake for 15 minutes, remove the weights and parchment, then bake 5–8 minutes more until light golden all over. Set aside to cool slightly. Reduce the oven to 350°F (175°C).
      4. Make the filling: In a saucepan, whisk together the sugar, cornstarch, flour, and salt. Whisk in the water until smooth. Cook over medium heat, whisking constantly, for about 5 minutes, until thickened and just starting to bubble.
      5. Whisk about 1/4 cup of the hot mixture into the egg yolks to temper them, then pour the yolk mixture back into the saucepan. Cook for 2 more minutes, whisking constantly, until very thick. Remove from heat and stir in the butter, lemon juice, and lemon zest until smooth.
      6. Pour the hot filling into the baked crust immediately.
      7. Make the meringue: Beat the egg whites and cream of tartar on medium speed until foamy. Increase the speed and add the sugar one tablespoon at a time, beating until stiff, glossy peaks form. Beat in the vanilla extract.
      8. Spread the meringue over the hot filling, making sure it touches the crust edge all the way around to seal it in. Swirl or peak the top with the back of a spoon.
      9. Bake at 350°F (175°C) for 10–12 minutes, until the meringue is golden brown.
      10. Cool the pie on a wire rack at room temperature for 1 hour, then refrigerate for at least 2 hours before slicing.

    Notes

    ⦁ Room-temperature egg whites whip to a taller, more stable meringue than cold ones.
    ⦁ Cook the filling until it’s very thick before removing it from the heat — an under-cooked filling won’t set and will make the pie runny.
    ⦁ Spread the meringue while the filling is still hot; this is what prevents shrinking and weeping.
    ⦁ For best texture, serve the pie the same day or the day after it’s made.
  • Hummingbird Cake

    Hummingbird Cake

    small batch hummingbird cake

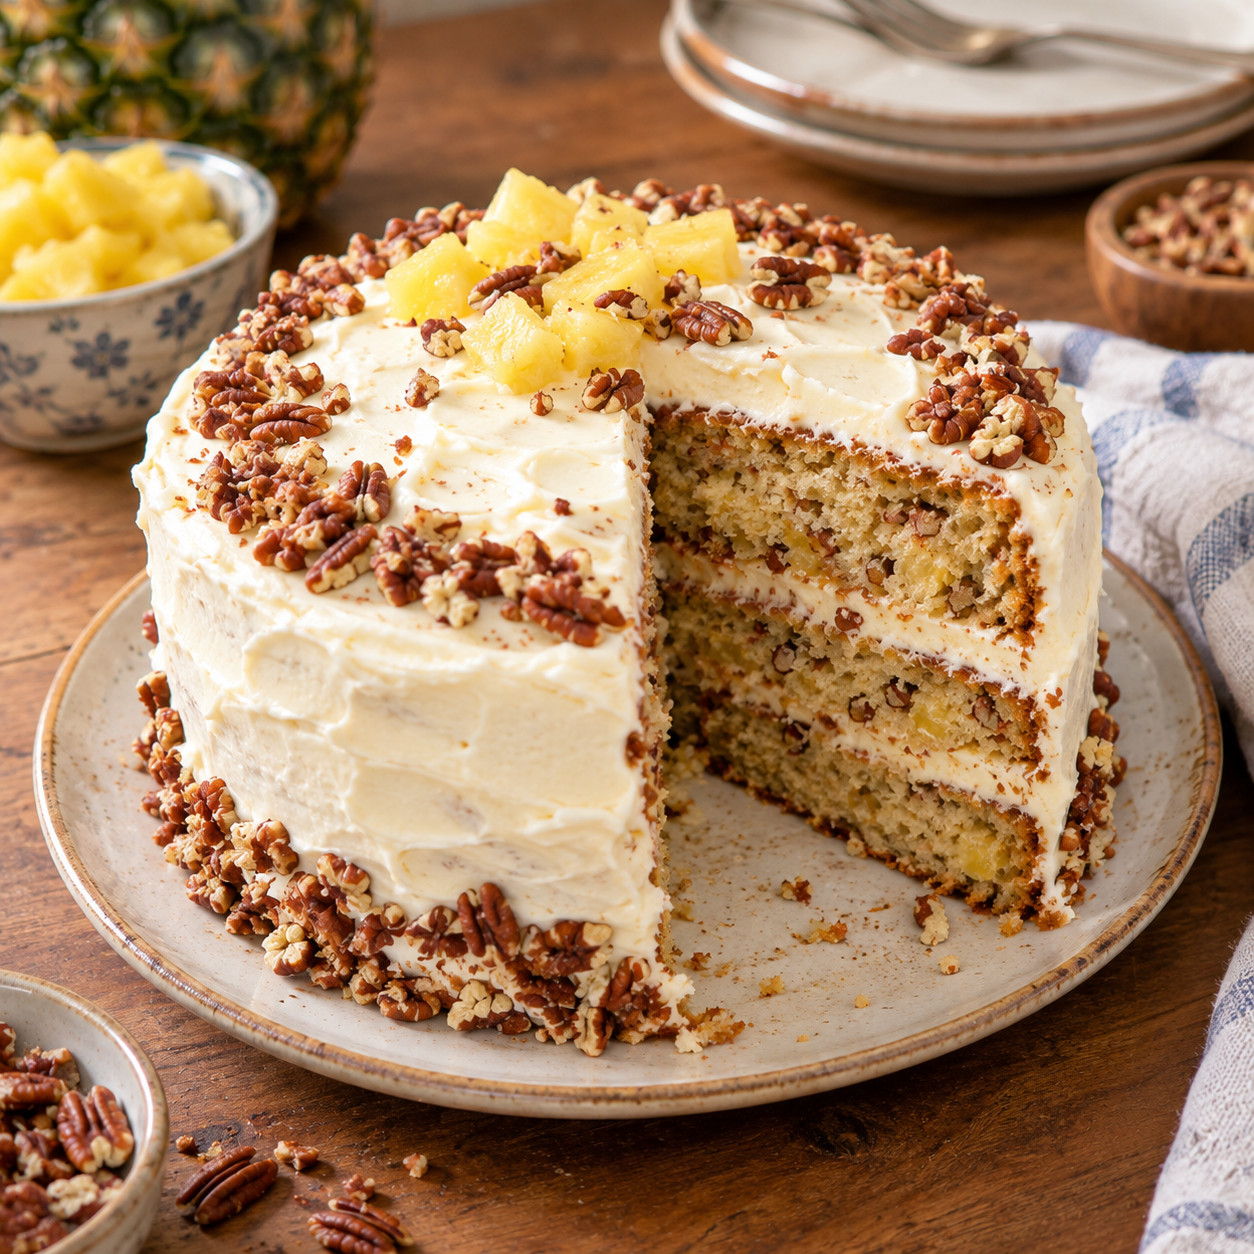
    If you love the idea of hummingbird cake but don’t want to bake a giant three-layer cake for two people, this small batch hummingbird cake was made for you. It has everything that makes the classic version so beloved — ripe banana, crushed pineapple, warm cinnamon, and toasted pecans — baked into one modest 8-inch pan and topped with tangy cream cheese frosting. No leftovers sitting on the counter for a week, just one perfectly moist cake sized for a small household.
    This recipe is fully tested and written for reliability, not just speed. You’ll get exact measurements, visual cues for doneness, and answers to the questions that come up most when bakers try hummingbird cake for the first time.

    What Is Hummingbird Cake?

    Hummingbird cake is a Southern American cake made with mashed banana, crushed pineapple, cinnamon, and pecans, traditionally finished with cream cheese frosting. Unlike a typical banana cake, it uses oil instead of butter, which keeps the crumb dense, moist, and tender for days. The fruit does double duty here — pineapple adds gentle acidity and moisture, while banana adds natural sweetness and structure, so the cake needs very little added fat to stay soft.

    Why You’ll Love This Small Batch Hummingbird Cake

    • Scaled down to one 8-inch pan, so there’s no half-used can of pineapple or extra cake going stale.
    • Uses one bowl for the batter and one bowl for the frosting — minimal cleanup.
    • Naturally sweetened by real banana and pineapple, so it never tastes overly sugary.
    • Stays moist for days thanks to oil-based batter, not butter.
    • Nut-free option included for anyone with allergies or preferences.

    Ingredient Substitutions

    Small batch baking sometimes means working with what’s already in your kitchen. Here are substitutions that actually work in this recipe, without wrecking the texture.

    Slice of small batch hummingbird cake with cream cheese frosting and chopped pecans on a white plate
    IngredientSubstituteNotes
    Vegetable oilMelted coconut oil or canola oilKeeps the crumb equally moist
    PecansWalnuts, or omit entirelyOmit for a nut-free cake; texture stays the same
    Crushed pineappleFinely chopped fresh pineappleDrain well to avoid a soggy cake
    Brown sugarGranulated sugar + 1 tsp molassesKeeps the same moisture and flavor
    Cream cheese frostingSimple vanilla glazeBest if serving the cake the same day

    Expert Tips for the Best Hummingbird Cake

    • Use very ripe, spotty bananas. They mash more easily and add more natural sweetness, which is a big part of this cake’s flavor.
    • Drain the pineapple thoroughly. Press it in a fine-mesh strainer or between paper towels — excess liquid is the most common cause of a dense, gummy cake.
    • Toast the pecans for 5 minutes in a dry skillet before adding them. It deepens their flavor and adds welcome crunch against the soft crumb.
    • Only frost once the cake is fully cool. Warm cake will melt the cream cheese frosting and make it slide right off.
    • Fold, don’t stir. Overmixing the batter after adding the flour develops gluten and can make the cake tough instead of tender.

    Common Mistakes to Avoid

    • Skipping the pineapple drain step, which leads to a soggy, dense cake that never fully sets in the middle.
    • Using cold cream cheese and butter for the frosting, which leaves lumps no amount of beating can smooth out.
    • Opening the oven door in the first 20 minutes of baking, which can cause the cake to sink slightly in the center.
    • Overbaking while chasing a perfectly clean toothpick — a few moist crumbs is exactly what you want; a fully clean toothpick usually means the cake is already past its best texture.

    Recipe Variations

    • Hummingbird cupcakes: divide the batter into 8 to 9 lined muffin cups and bake for 16 to 18 minutes.
    • Hummingbird bundt-style loaf: bake in a small loaf pan for about 40 to 45 minutes, adjusting for your pan size.
    • Coconut hummingbird cake: fold 2 tablespoons of shredded coconut into the batter and sprinkle toasted coconut over the frosting.
    • Nut-free version: simply omit the pecans from the batter and topping; the cake holds together perfectly without them.

    Serving Suggestions

    This cake is rich enough to serve on its own with a cup of coffee or tea, but it also pairs nicely with a small scoop of vanilla ice cream for dessert. Because the crumb is already moist and the frosting is tangy, it doesn’t need much else — a light dusting of extra cinnamon or a few pecan halves on top is all it takes to make it feel special.

    How to Store Small Batch Hummingbird Cake

    Room temperature: Because of the cream cheese frosting, this cake is best stored in the refrigerator rather than at room temperature.

    Refrigerator: Store covered in an airtight container for up to 5 days. Let slices sit at room temperature for about 15 minutes before serving for the best texture.

    Freezer: Freeze unfrosted cake, well wrapped, for up to 2 months. Thaw overnight in the refrigerator, then frost before serving. Frosted slices can also be frozen individually; thaw in the fridge and bring to room temperature before eating.

     Slice of small batch hummingbird cake with cream cheese frosting and chopped pecans on a white plate

    Frequently Asked Questions

    Why is it called hummingbird cake?

    The name is believed to come from the cake’s sweetness, which is thought to be irresistible enough to attract hummingbirds, similar to how they’re drawn to sugary nectar. It originated in Jamaica and became popular in the American South in the 1970s.

    Can I make this cake without pecans?

    Yes. Simply leave the pecans out of the batter and skip the topping. The banana and pineapple provide plenty of moisture and flavor on their own, so the texture won’t suffer.

    Can I use fresh pineapple instead of canned?

    Fresh pineapple works well as long as it’s finely chopped and well drained. Canned crushed pineapple is more consistent in moisture, which is why it’s used here, but ripe fresh pineapple is a fine substitute.

    Why did my hummingbird cake turn out dense?

    Dense hummingbird cake is almost always caused by excess liquid, usually from pineapple that wasn’t drained well enough, or from overmixing the batter after the flour is added. Measuring the flour by weight also helps avoid this.

    Can I double this recipe for a bigger cake?

    Yes, this recipe doubles well for a 9×13-inch pan or two 8-inch round layers. Increase the baking time to about 35 to 40 minutes and check with a toothpick for doneness.

    More Baking Recipes You’ll Love

    If you enjoyed this small batch hummingbird cake, you’ll love these other recipes from Iwannabake.com:

    Slice of small batch hummingbird cake with cream cheese frosting and chopped pecans on a white plate
    iwannabake.com

    Small Batch Hummingbird Cake

    A moist small batch hummingbird cake made with banana, pineapple, cinnamon, and toasted pecans, topped with tangy cream cheese frosting. Baked in one 8-inch pan, just the right size for a small household.
    Prep Time 15 minutes
    Cook Time 30 minutes
    Total Time 1 hour 30 minutes
    Servings: 9 squares
    Course: Dessert
    Cuisine: American, Southern
    Calories: 260

    Ingredients
      

    • 1 cup (125g) all-purpose flour
    • 1/2 tsp baking soda
    • 1/2 tsp ground cinnamon
    • 1/4 tsp salt
    • 1/2 cup (100g) granulated sugar
    • 1/4 cup (50g) packed light brown sugar
    • 1/3 cup (75ml) neutral oil
    • 1 large egg, room temperature
    • 1/2 tsp vanilla extract
    • 1/2 cup (120g) mashed ripe banana
    • 1/2 cup (120g) crushed pineapple, drained
    • 1/3 cup (35g) chopped pecans, toasted, plus extra for topping

    Method
     

    1. 1. Preheat oven to 350°F (175°C). Grease and line an 8×8-inch pan with parchment paper.
      2. Whisk flour, baking soda, cinnamon, and salt in a medium bowl.
      3. In a large bowl, whisk sugar, brown sugar, and oil. Add egg and vanilla; whisk until smooth.
      4. Stir in mashed banana and drained crushed pineapple.
      5. Fold in dry ingredients until just combined, then fold in toasted pecans.
      6. Pour into prepared pan and bake 28–32 minutes, until a toothpick comes out with a few moist crumbs.
      7. Cool in the pan 15 minutes, then transfer to a wire rack to cool completely, about 45 minutes.
      8. Beat cream cheese and butter until smooth. Add powdered sugar, vanilla, and salt; beat until fluffy.
      9. Spread frosting over the cooled cake, top with extra pecans, slice into 9 squares, and serve.

    Notes

    ⦁ Drain the crushed pineapple well to avoid a dense, soggy cake.
    ⦁ Store frosted cake in the refrigerator for up to 5 days.
    ⦁ Freeze the unfrosted cake, well wrapped, for up to 2 months.
    ⦁ For a nut-free version, omit the pecans from the batter and topping.
     
    Slice of small lemon meringue pie with golden toasted meringue on a white plate
    iwannabake.com

    Meringue Pie (Easy 6-Inch Pie for Two)

    A small, from-scratch lemon meringue pie with a buttery crust, silky-tart lemon filling, and fluffy toasted meringue. Perfectly portioned for two to four servings — no leftovers to worry about.
    Prep Time 25 minutes
    Cook Time 30 minutes
    Total Time 1 hour 30 minutes
    Course: Basics, Dessert
    Cuisine: American
    Calories: 290

    Ingredients
      

    Crust
    • 3/4 cup (95g) all-purpose flour
    • 1/4 teaspoon salt
    • 1/2 teaspoon granulated sugar
    • 5 tablespoons (70g) cold unsalted butter, cubed
    • 2–3 tablespoons ice water
    Lemon Filling
    • 2/3 cup (135g) granulated sugar
    • 2 tablespoons (16g) cornstarch
    • 1 tablespoon (8g) all-purpose flour
    • Pinch of salt
    • 3/4 cup (180ml) water
    • 2 large egg yolks (reserve the whites for the meringue)
    • 1/3 cup (80ml) fresh lemon juice, about 2 medium lemons
    • 1 teaspoon lemon zest
    • 2 tablespoons (28g) unsalted butter
    Meringue
    • 2 large egg whites, room temperature
    • 1/4 teaspoon cream of tartar
    • 1/4 cup (50g) granulated sugar
    • 1/2 teaspoon vanilla extract

    Method
     

    1. 1. Make the crust: In a bowl, whisk together the flour, salt, and sugar. Cut in the cold butter with a pastry cutter or your fingers until the mixture looks like coarse crumbs with pea-sized butter pieces. Add ice water one tablespoon at a time, mixing just until the dough comes together. Shape into a disk, wrap, and chill for 30 minutes.
      2. Roll the chilled dough on a lightly floured surface and fit it into a 6-inch pie or tart pan. Trim and crimp the edges, then prick the bottom all over with a fork. Chill for another 15 minutes.
      3. Preheat the oven to 375°F (190°C). Line the crust with parchment paper and fill with pie weights (or dried beans). Blind bake for 15 minutes, remove the weights and parchment, then bake 5–8 minutes more until light golden all over. Set aside to cool slightly. Reduce the oven to 350°F (175°C).
      4. Make the filling: In a saucepan, whisk together the sugar, cornstarch, flour, and salt. Whisk in the water until smooth. Cook over medium heat, whisking constantly, for about 5 minutes, until thickened and just starting to bubble.
      5. Whisk about 1/4 cup of the hot mixture into the egg yolks to temper them, then pour the yolk mixture back into the saucepan. Cook for 2 more minutes, whisking constantly, until very thick. Remove from heat and stir in the butter, lemon juice, and lemon zest until smooth.
      6. Pour the hot filling into the baked crust immediately.
      7. Make the meringue: Beat the egg whites and cream of tartar on medium speed until foamy. Increase the speed and add the sugar one tablespoon at a time, beating until stiff, glossy peaks form. Beat in the vanilla extract.
      8. Spread the meringue over the hot filling, making sure it touches the crust edge all the way around to seal it in. Swirl or peak the top with the back of a spoon.
      9. Bake at 350°F (175°C) for 10–12 minutes, until the meringue is golden brown.
      10. Cool the pie on a wire rack at room temperature for 1 hour, then refrigerate for at least 2 hours before slicing.

    Notes

    ⦁ Room-temperature egg whites whip to a taller, more stable meringue than cold ones.
    ⦁ Cook the filling until it’s very thick before removing it from the heat — an under-cooked filling won’t set and will make the pie runny.
    ⦁ Spread the meringue while the filling is still hot; this is what prevents shrinking and weeping.
    ⦁ For best texture, serve the pie the same day or the day after it’s made.