Tag: fall baking

  • Homemade Apple Fritters

    Homemade Apple Fritters

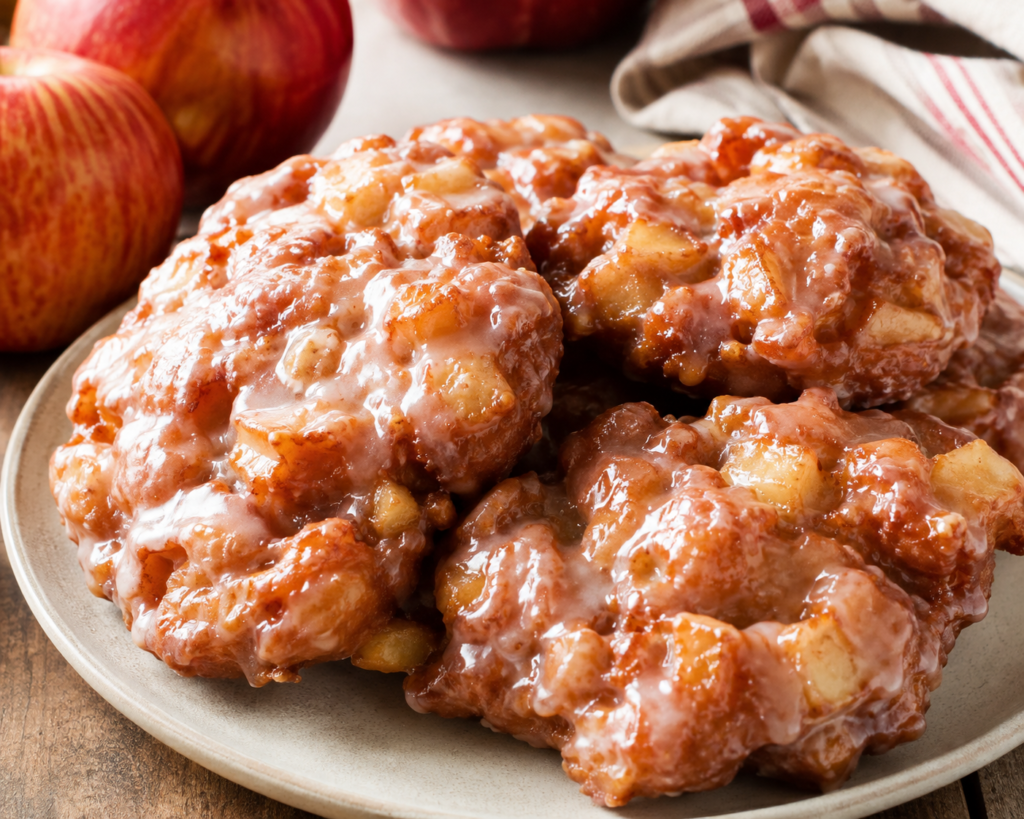
    baked apple fritters

    Baked Apple Fritters (No Deep Fryer Needed!)

    These baked apple fritters give you all the cozy, cinnamon-apple flavor of the classic fair-food treat, without a single drop of frying oil. They’re soft and cake-like on the inside, lightly golden on the outside, and finished with a sweet vanilla glaze that soaks into every bite. If you’ve been searching for baked apple fritters that actually taste like the real thing, this recipe is the one to bookmark.
    This recipe uses a simple batter you stir together in one bowl, fresh diced apples, and a hot oven instead of a pot of oil. That means less mess, less cleanup, and a dessert you can pull together on a weeknight without babysitting a fryer. Below you’ll find the full ingredient list, step-by-step instructions, a printable-style recipe card, and answers to the most common questions about making apple fritters at home.

    Why You’ll Love This Baked Apple Fritters Recipe

    ⦁ No deep fryer, no hot oil splatters, and no oil smell lingering in your kitchen.
    ⦁ One bowl, one baking sheet — cleanup takes minutes.
    ⦁ Ready in about 35 minutes, start to finish.
    ⦁ Soft, moist crumb studded with real cinnamon-spiced apple pieces.
    ⦁ A simple glaze that sets into a light, crackly shell.

    Ingredients for Baked Apple Fritters

    Here’s what you’ll need. Exact measurements are in the recipe card near the bottom of this post.

    For the Fritter Batter

    ⦁ All-purpose flour
    ⦁ Granulated sugar
    ⦁ Baking powder
    ⦁ Ground cinnamon and a pinch of nutmeg
    ⦁ Salt
    ⦁ 1 large egg
    ⦁ Whole milk
    ⦁ Unsalted butter, melted and slightly cooled
    ⦁ Vanilla extract
    ⦁ 2 medium apples, peeled, cored, and diced small

    For the Glaze

    ⦁ Powdered sugar
    ⦁ Milk
    ⦁ Vanilla extract

    How to Make Baked Apple Fritters

    Prep the Apples

    Peel, core, and dice your apples into small, roughly quarter-inch pieces. Smaller pieces bake through evenly and are easier to scoop and shape. Toss the diced apples with a spoonful of the cinnamon-sugar mixture from the batter — this pulls out a little extra moisture and boosts the apple flavor in every bite.

    Mix the Batter

    Whisk the dry ingredients together in a large bowl: flour, sugar, baking powder, cinnamon, nutmeg, and salt. In a separate bowl, whisk the egg, milk, melted butter, and vanilla. Pour the wet ingredients into the dry ingredients and stir just until combined. The batter should look thick and slightly lumpy, similar to a scoopable muffin batter, not a smooth pancake batter. Overmixing at this stage is the number one reason baked fritters turn out tough, so stop as soon as you no longer see streaks of flour.

    Fold in the Apples

    Gently fold the diced apples into the batter with a spatula. The batter will look chunky and a little unevenly distributed — that’s exactly right.

    Shape and Bake

    Scoop rounded mounds of batter onto a parchment-lined baking sheet, spacing them about 2 inches apart. Flatten each mound slightly with the back of a spoon so it bakes into a fritter shape rather than a tall dome. Bake in a preheated 375°F (190°C) oven for 18 to 20 minutes, until the tops are golden and a toothpick inserted into the center comes out clean.

    Glaze While Warm

    Let the fritters cool on the pan for about 5 minutes, then whisk together the powdered sugar, milk, and vanilla until smooth. Dip the top of each warm fritter into the glaze, or spoon the glaze over the top. Set them on a wire rack for a few minutes so the glaze can set into a light, crackly coating.

    Expert Tips for Perfect Baked Apple Fritters

    ⦁ Use a firm, slightly tart apple. Soft apples like Red Delicious turn mushy and release too much liquid as they bake.
    ⦁ Dice the apples small. Large chunks stay hard in the center and can make the fritters fall apart when you flatten them.
    ⦁ Don’t skip flattening the mounds. Because these are baked, not fried, they won’t spread on their own the way a scoop of cookie dough might.
    ⦁ Bring your egg and milk to room temperature before mixing. Cold dairy can make the melted butter clump instead of blending in smoothly.
    ⦁ Glaze the fritters while they’re still warm. The glaze soaks in slightly and sets into a thin, shiny coating instead of sitting on top like frosting.

    Common Mistakes to Avoid

    ⦁ Overmixing the batter, which develops gluten and leads to a dense, tough fritter instead of a tender one.
    ⦁ Using apples straight from the fridge without patting them dry, which adds extra moisture and can make the centers gummy.
    ⦁ Making the mounds too large. Oversized fritters often brown on the outside before the center finishes baking.
    ⦁ Skipping the parchment paper, which can cause the glazed bottoms to stick to the pan.

    Ingredient Substitutions

    These swaps have all been tested and work well if you’re missing an ingredient or baking for dietary needs.

    IngredientPossible Substitute
    Apples (Honeycrisp or Gala)Granny Smith, Braeburn, or Fuji apples
    All-purpose flourWhite whole wheat flour (slightly denser texture)
    Whole milkAny dairy-free milk, such as oat or almond milk
    Unsalted butterNeutral oil, like avocado or vegetable oil
    Granulated sugarLight brown sugar (adds a deeper, caramel note)
    Ground nutmegA pinch of ground cloves or allspice

    Variations to Try

    ⦁ Apple Cider Fritters: replace the milk in the batter with apple cider for a stronger apple flavor.
    ⦁ Caramel Apple Fritters: drizzle warm caramel sauce over the glaze just before serving.
    ⦁ Cinnamon Sugar Fritters: skip the glaze and toss the warm fritters in a bowl of cinnamon sugar instead.
    ⦁ Mini Fritter Bites: scoop smaller mounds and reduce the bake time to 12 to 14 minutes for a bite-sized, snackable version.

    Storage and Freezing Instructions

    How to Store Baked Apple Fritters

    Store cooled fritters in an airtight container at room temperature for up to 2 days, or in the refrigerator for up to 5 days. Glazed fritters can get slightly sticky in the fridge, which is normal.

    Can You Freeze Apple Fritters?

    Yes. Freeze the baked fritters without glaze in a single layer until solid, then transfer to a freezer bag for up to 3 months. Thaw at room temperature and glaze just before serving for the best texture

    How to Reheat

    Warm fritters in a 300°F oven for about 8 minutes, or in the microwave for 15 to 20 seconds, to bring back that fresh-baked softness.

    Troubleshooting

    Why are my baked apple fritters dense or heavy?

    This usually means the batter was overmixed, or the baking powder is old and has lost its strength. Stir just until the flour disappears, and check that your baking powder is within its expiration date.

    Why did my fritters turn out soggy in the middle?

    Apple pieces that are cut too large release liquid slowly as they bake, leaving the center underdone. Dice the apples small and make sure your oven is fully preheated before baking.

    Why did my glaze slide right off?

    The fritters were likely still too hot. Let them cool for a full 5 minutes first so the glaze sets on the surface instead of melting through.

    Frequently Asked Questions

    Are baked apple fritters healthier than fried ones?1

    Baked fritters use only a few tablespoons of butter total, compared to a full pot of oil for frying, so they contain noticeably less fat per serving while keeping a similarly soft, tender texture.

    What is the best apple for apple fritters?

    Firm, slightly tart apples like Honeycrisp, Gala, or Granny Smith hold their shape best during baking and balance the sweetness of the glaze.

    Can I make the batter ahead of time?

    It’s best to bake the batter right after mixing, since the baking powder starts working immediately. If you need to prep ahead, dice the apples and measure the dry ingredients the night before, then mix everything together just before baking.

    Can I make these fritters without eggs?

    Yes. A flax egg (1 tablespoon ground flaxseed mixed with 3 tablespoons water, rested for 5 minutes) works as a substitute and keeps the fritters tender.

    Related Recipes You’ll Love

    If you enjoyed this recipe, these baking guides from iwannabake.com are worth trying next:
    Small Batch Apple Muffins
    Baked Apple Cider Donuts
    ⦁ 2 Banana Banana Bread
    Small Batch Cinnamon Rolls
    ⦁ Why Is My Banana Bread Dry? (And How to Fix It)

    1. ↩︎
    Glazed baked apple fritters cooling on a wire rack with a bowl of cinnamon apples in the background
    iwannabake.com

    Baked Apple Fritters

    Soft, cinnamon-spiced apple fritters baked instead of fried, then topped with a sweet vanilla glaze. Ready in about 35 minutes with simple pantry ingredients.
    Prep Time 15 minutes
    Cook Time 18 minutes
    Total Time 35 minutes
    Course: Breakfast, Dessert, Snack
    Cuisine: American
    Calories: 165

    Ingredients
      

    • 2 cups (250g) all-purpose flour
    • 1/3 cup (65g) granulated sugar
    • 2 1/2 teaspoons baking powder
    • 1 1/2 teaspoons ground cinnamon
    • 1/4 teaspoon ground nutmeg
    • 1/2 teaspoon salt
    • 1 large egg, room temperature
    • 2/3 cup (160ml) whole milk, room temperature
    • 3 tablespoons unsalted butter, melted and cooled
    • 1 teaspoon vanilla extract
    • 2 medium apples, peeled, cored, and diced small (about 1 1/2 cups)

    Method
     

    1. 1. Preheat the oven to 375°F (190°C) and line a baking sheet with parchment paper.
      2. In a large bowl, whisk together the flour, sugar, baking powder, cinnamon, nutmeg, and salt.
      3. In a separate bowl, whisk the egg, milk, melted butter, and vanilla extract until combined.
      4. Pour the wet ingredients into the dry ingredients and stir just until no streaks of flour remain. The batter will be thick.
      5. Gently fold in the diced apples.
      6. Scoop 1/4-cup mounds of batter onto the prepared baking sheet, spacing them 2 inches apart. Flatten each mound slightly with the back of a spoon.
      7. Bake for 18 to 20 minutes, until golden on top and a toothpick inserted in the center comes out clean.
      8. Let the fritters cool on the pan for 5 minutes.
      9. Whisk the powdered sugar, milk, and vanilla together until smooth. Dip or spoon the glaze over the warm fritters.
      10. Let the glaze set for a few minutes on a wire rack before serving.

    Notes

    ⦁ Use a firm, tart apple such as Honeycrisp, Gala, or Granny Smith for the best texture.
    ⦁ Store in an airtight container at room temperature for up to 2 days, or in the fridge for up to 5 days.
    ⦁ Freeze unglazed fritters for up to 3 months; thaw and glaze before serving.
  • Pumpkin Bread Recipe

    Pumpkin Bread Recipe

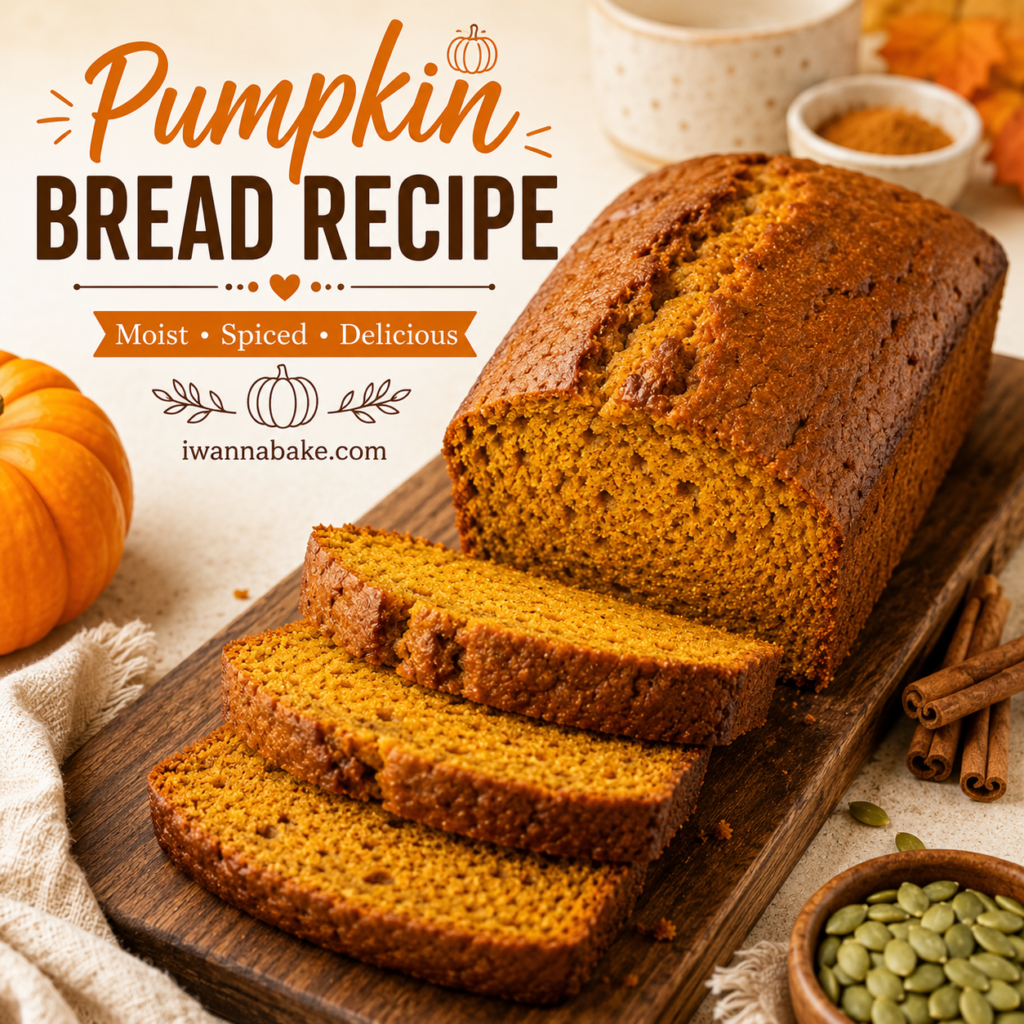
    small batch pumpkin bread

    Small Batch Pumpkin Bread Recipe (One Loaf, Extra Moist)

    If your pumpkin bread cravings hit hard but you don’t want two loaves taking over your counter, this small batch pumpkin bread recipe is for you. It makes one 8×4-inch loaf — just enough for a small household, a weekend treat, or a cozy fall snack without a freezer full of extras.
    This recipe uses simple pantry staples, comes together in one bowl, and doesn’t require a mixer. The result is a moist, tender crumb with warm pumpkin spice flavor in every slice, and a texture closer to a rich cake than a dry, crumbly quick bread.

    Why This Small Batch Pumpkin Bread Recipe Works

    Most pumpkin bread recipes are scaled for two loaves, which means measuring in awkward fractions or ending up with more bread than you can eat before it goes stale. This recipe is built from the ground up for a single loaf, so every measurement is easy to follow and there’s no leftover half-can of pumpkin puree guesswork.

    It also solves the most common pumpkin bread complaint: dryness. Using oil instead of butter keeps the crumb soft for days, and a full cup of pumpkin puree (not just a splash) means the bread stays moist without turning gummy.

    Ingredients You’ll Need

    Here’s what goes into this loaf, plus a few notes on why each ingredient matters.
    ⦁ All-purpose flour — the base structure of the loaf
    ⦁ Baking soda and a pinch of baking powder — for a good rise without a domed, cracked top
    Pumpkin pie spice (or cinnamon, ginger, nutmeg, and cloves) — for classic fall flavor
    ⦁ Salt — balances the sweetness
    ⦁ Granulated sugar and brown sugar — brown sugar adds moisture and a light caramel note
    ⦁ Neutral oil, like vegetable or canola oil — keeps the crumb soft even after refrigeration
    ⦁ One large egg — for structure and richness
    ⦁ Canned pumpkin puree — not pumpkin pie filling, which is pre-sweetened and spiced
    ⦁ Vanilla extract — rounds out the spice flavor

    Instructions

    1. Preheat the oven to 350°F (175°C). Grease an 8×4-inch loaf pan or line it with parchment paper, leaving overhang on the sides for easy removal.
    2. In a medium bowl, whisk together the flour, baking soda, baking powder, salt, and pumpkin pie spice. Set aside.
    3. In a large bowl, whisk the granulated sugar, brown sugar, and oil until combined. Add the egg and whisk until smooth.
    4. Whisk in the pumpkin puree and vanilla extract until the batter is fully combined and evenly colored.
    5. Add the dry ingredients to the wet ingredients. Fold gently with a spatula just until no streaks of flour remain — do not overmix. Fold in add-ins now, if using.
    6. Pour the batter into the prepared pan and smooth the top with a spatula.
    7. Bake for 45–55 minutes, until a toothpick inserted in the center comes out clean or with a few moist crumbs. If the top is browning too quickly, loosely tent it with foil after 30 minutes.
    8. Cool the loaf in the pan for 10 minutes, then lift it out using the parchment overhang and let it cool completely on a wire rack before slicing.

    Expert Tips for Baking Success

    ⦁ Measure flour correctly. Spoon the flour into your measuring cup and level it off with a knife. Scooping directly from the bag packs in extra flour and leads to a dense, dry loaf.
    ⦁ Don’t overmix the batter. Stir just until the flour disappears. Overmixing develops gluten and makes the bread tough and rubbery instead of tender.
    ⦁ Check for doneness early. Ovens vary, so start checking at the 45-minute mark. A toothpick with a few moist crumbs (not wet batter) means it’s done.
    ⦁ Let it cool before slicing. Cutting into a warm loaf makes it seem gummy, even when it’s fully baked. Give it at least 20–30 minutes to set.

    Common Mistakes to Avoid

    ⦁ Using pumpkin pie filling instead of plain pumpkin puree, which makes the bread overly sweet and unbalanced.
    ⦁ Overbaking, which is the most common cause of dry pumpkin bread. Pull the loaf as soon as the toothpick test passes.
    ⦁ Skipping the parchment sling, which can cause the loaf to stick or break apart when removing it from the pan.
    ⦁ Adding too many mix-ins, which weighs down the batter and can cause a dense, underbaked center.

    Ingredient Substitutions

    This recipe is flexible. Here are reliable swaps if you’re missing something:

    IngredientSubstituteNotes
    Neutral oilMelted, cooled butterSlightly less moist, but still tender
    Brown sugarExtra granulated sugarLoses a little depth of flavor and moisture
    Pumpkin pie spice1 tsp cinnamon + 1/4 tsp each ginger, nutmeg, clovesSame flavor profile, built from basics
    All-purpose flour1:1 gluten-free baking flourTexture may be slightly denser
    Egg1/4 cup unsweetened applesauceMakes the loaf egg-free and slightly more moist

    Variations to Try

    ⦁ Chocolate chip pumpkin bread: fold in 1/3 cup mini chocolate chips.
    ⦁ Streusel-topped pumpkin bread: sprinkle a mix of brown sugar, flour, and softened butter over the batter before baking.
    Cream cheese swirl: dollop sweetened cream cheese over the batter and swirl gently with a knife before baking.
    ⦁ Nutty pumpkin bread: fold in 1/3 cup chopped walnuts or pecans for crunch.

    Storage Instructions

    Store the cooled loaf tightly wrapped in plastic wrap or in an airtight container at room temperature for up to 3 days, or in the refrigerator for up to a week. Bring refrigerated slices to room temperature, or warm them for 10–15 seconds in the microwave, before serving for the best texture.

    Freezing Instructions

    This small batch pumpkin bread freezes well. Wrap the fully cooled loaf (or individual slices) tightly in plastic wrap, then place it in a freezer-safe bag or container. Freeze for up to 3 months. Thaw at room temperature for a few hours, or overnight in the refrigerator, before serving.

    Troubleshooting

    Why is my pumpkin bread dense or gummy?

    This usually means the batter was overmixed, the loaf was underbaked, or the pan was too small for the batter, causing the center to stay wet while the edges set. Stick to an 8×4-inch pan and check doneness with a toothpick before removing it from the oven.

    Why did my pumpkin bread sink in the middle?

    A sunken center is often caused by underbaking, too much leavening, or opening the oven door too early. Avoid checking the loaf before the 30-minute mark, and make sure your baking soda and baking powder are fresh.

    Why is my pumpkin bread dry?

    Dryness is almost always the result of too much flour or overbaking. Spoon and level your flour rather than scooping, and pull the loaf as soon as a toothpick comes out with just a few moist crumbs.

    Frequently Asked Questions

    Can I double this recipe?
    Yes. Doubling the ingredients and baking the batter in a standard 9×5-inch loaf pan works well; expect a slightly longer bake time, closer to 60–65 minutes.
    Can I make this into muffins instead?
    Yes. Divide the batter among 8–9 lined muffin cups and bake at 350°F (175°C) for 18–22 minutes, or until a toothpick comes out clean.
    Do I need a mixer for this recipe?
    No. This recipe is designed to be mixed by hand with a whisk and spatula, which also helps prevent overmixing.
    Can I use fresh pumpkin instead of canned?
    Yes, as long as it’s well-drained. Fresh pumpkin puree can be watery, which can make the loaf dense, so press it through a fine sieve or cheesecloth to remove excess liquid before measuring.

    More Recipes You’ll Love

    If you enjoyed this small batch pumpkin bread, here are a few more Iwannabake.com recipes worth trying:
    ⦁ Small Batch Banana Bread
    2 Banana Banana Bread
    ⦁ Banana Bread Without Eggs
    ⦁ Small Batch Chocolate Chip Cookies
    Banana Chocolate Chip Muffins

    Close-up of a sliced small batch pumpkin bread loaf with cinnamon sticks and pumpkins in the background
    iwannabake.com

    Small Batch Pumpkin Bread

    A moist, tender small batch pumpkin bread made with warm fall spices. This easy one-bowl recipe makes a single loaf, perfect for small households who don't need two loaves' worth of pumpkin bread.
    Prep Time 10 minutes
    Cook Time 50 minutes
    Total Time 1 hour
    Servings: 8 slices (1 loaf, 8×4-inch pan)
    Course: Breakfast, Snack, Dessert
    Cuisine: American
    Calories: 180

    Ingredients
      

    • 1 cup (125g) all-purpose flour
    • 1/2 tsp baking soda
    • 1/4 tsp baking powder
    • 1/2 tsp salt
    • 1 1/2 tsp pumpkin pie spice
    • 1/3 cup (65g) granulated sugar
    • 1/3 cup (65g) packed brown sugar
    • 1/3 cup (80ml) neutral oil (vegetable or canola)
    • 1 large egg, room temperature
    • 1 cup (240g) canned pumpkin puree
    • 1/2 tsp vanilla extract
    • 1/3 cup chocolate chips, chopped walnuts, or pecans

    Method
     

    1. 1. Preheat the oven to 350°F (175°C). Grease an 8×4-inch loaf pan or line it with parchment paper, leaving overhang on the sides for easy removal.
      2. In a medium bowl, whisk together the flour, baking soda, baking powder, salt, and pumpkin pie spice. Set aside.
      3. In a large bowl, whisk the granulated sugar, brown sugar, and oil until combined. Add the egg and whisk until smooth.
      4. Whisk in the pumpkin puree and vanilla extract until the batter is fully combined and evenly colored.
      5. Add the dry ingredients to the wet ingredients. Fold gently with a spatula just until no streaks of flour remain — do not overmix. Fold in add-ins now, if using.
      6. Pour the batter into the prepared pan and smooth the top with a spatula.
      7. Bake for 45–55 minutes, until a toothpick inserted in the center comes out clean or with a few moist crumbs. If the top is browning too quickly, loosely tent it with foil after 30 minutes.
      8. Cool the loaf in the pan for 10 minutes, then lift it out using the parchment overhang and let it cool completely on a wire rack before slicing

    Notes

    ⦁ Use canned pumpkin puree, not pumpkin pie filling — pie filling already contains sugar and spices, which will throw off the recipe.
    ⦁ Room-temperature egg blends more smoothly into the batter and helps the loaf rise evenly.
    ⦁ For a bakery-style domed top, place the pan on the middle oven rack and avoid opening the oven door during the first 30 minutes of baking.