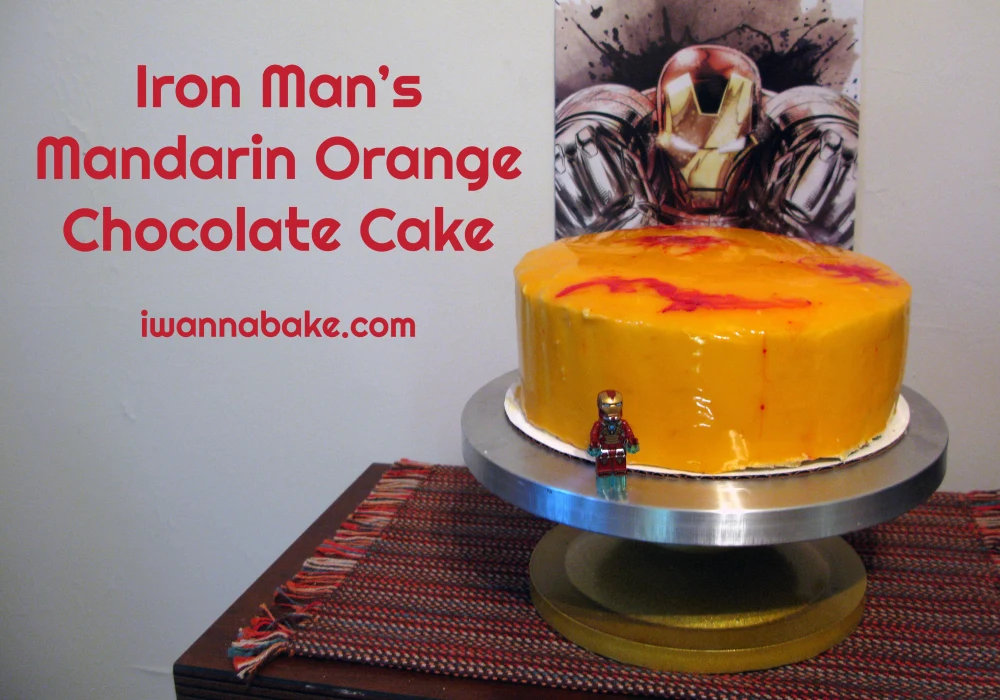
We’ve made it to Phase Two! Following my previous mirror glaze post, it’s time to reveal the cake it covered. This week, we’re talking about Iron Man 3. To find out how that relates to mandarin orange chocolate cake (which I can assure you tastes even better than it looks), read on!
I was a little nervous when I got to Iron Man 3 because at this point, I’ve already written two Iron Man recipes for this series (you can check them out here and here). I didn’t really want to do more arc reactors because I’d already been there, done that. Thankfully, watching the movie helped to give me a jump start and get me out of arc reactor land.
According to the IMDB summary, “When Tony Stark’s world is torn apart by a formidable terrorist called the Mandarin, he starts an odyssey of rebuilding and retribution.” As is often the case with Marvel movies, there is a lot going on here. Tony Stark is not only dealing with his PTSD-like symptoms following the Battle of New York in The Avengers, but he is also dealing with some demons returning from his past. The movie starts off with an unfortunate song choice (I’ll spare you the link so you don’t have to get it stuck in your head) to show that we’re flashing back to a New Year’s Eve party in 1999. It’s there that pre-Iron Man Tony Stark makes some enemies and sets the stage for the events that are about to unfold.
When we return the the present day, a new terrorist who calls himself the Mandarin is threatening the world, and Tony Stark is not about to sit back and take it. However, beneath the veneer of the Mandarin lurks the true villain. Stark’s self-obsessed, hedonistic lifestyle has come back to bite him, and this time his enemy is smart enough to distract him with a decoy. It’s not exactly difficult while watching the movie to figure out what’s really going on, particularly with the initial flashback, but there are a few twists that might be unexpected. I will admit that I was reminded of this song from Unbreakable Kimmy Schmidt whenever the increasing number of Iron Man suits and drones came up, but overall, the movie was still entertaining.
So, obviously, I chose mandarin orange because of the conveniently-named villain. However, mandarin oranges (or clementines in my case) turn out to provide just the right amount of sweetness and tartness to complement the heavy chocolate cake. It isn’t news that chocolate and oranges go together, after all. I wasn’t able to get mandarin oranges at this time of year, so I used clementines instead, since they are in the same family. I believe that mandarins would make everything a bit more tart, so if you’d like to have that effect but are stuck with clementines like me, you can substitute a little lemon juice for some of the clementine juice instead.
The mirror glaze was also thematically inspired by the movie to represent the veneer of the Mandarin (I know, I’m going a bit overboard with these, but hey, I’m having fun). I talk about it in more detail in my previous post, so I’m not going to say much about it here. It doesn’t really change the flavor of the cake at all, but it looks lovely and did manage to help me save the cake from near-disaster when I almost dropped it (the glaze was sticky enough to hold everything together when I caught it on its way down).
I’ve used almost the same cake recipe before in my cinnamon chocolate cake with cookie butter frosting, and it’s based off of this recipe by Sally’s Baking Addiction. This time, I added a little hot sauce for a bit of extra kick. I forgot to include the ground cinnamon, and I missed it, so I’ve included it in the recipe so that you can enjoy the full extent of the cinnamony goodness. The frosting is based on my favorite Magnolia Bakery vanilla frosting recipe. I’ve replaced all of the liquid with mandarin orange/clementine juice and added the zest for good measure, and it is absolutely delicious, if I do say so myself. I’ve been tempted more than once to just eat it with a spoon. The mandarin orange/clementine curd is adapted from this recipe by Martha Stewart. I have to say, usually I don’t quite like Martha’s recipes, but this one turned out just right. It worked exactly as advertised and it tasted just right. Good job, Martha (clearly she needs my praise :-P).
You will need the following ingredients:
For the cake:

- 1¾ cups all-purpose flour
- 1¾ cups granulated sugar
- 1 Tbsp. ground cinnamon (not picture)
- 1 tsp. baking powder
- 1 tsp. baking soda
- 1 tsp. salt
- 1 cup buttermilk OR 1 cup milk plus 1 Tbsp. lemon juice
- ½ cup vegetable oil
- 2 eggs, room temperature
- 1 tsp. vanilla extract
- 8 oz. strong chai tea, or other cinnamon black tea of choice
- 2-3 dashes of hot sauce (optional)
For the mandarin orange/clementine curd (sorry, no picture):
- 6 large egg yolks
- grated zest of 3 mandarin oranges or clementines
- ½ cup mandarin orange or clementine juice
- ¾ cup granulated sugar
- 1 stick cold, unsalted butter, cubed
For the mandarin orange/clementine frosting:

- 8 oz. (2 sticks) unsalted butter, softened
- 6-8 cups powdered sugar
- ½ cup mandarin orange or clementine juice, strained
- grated zest of 3 mandarin oranges or clementines
Let’s get baking!
There are a lot of parts to this cake, so it helps to (a) get started a few days in advance and (b) do things in a certain order so that everything has time to cool/chill/set as necessary. My suggested first step is making the cake.
Preheat your oven to 350°F and prepare two 9″ cake pans. Set aside.
If you’re making your own buttermilk with milk and lemon juice, simply stir the milk and lemon juice together in a glass or ceramic container and let sit for at least 5 minutes. It will get clumpy and gross (this is what you want).
Brew your chai/cinnamon tea in 8 ounces of boiling water according to the package directions. I used Tea Forte’s Bombay Chai because it brews really strong and spicy. Sadly, it seems to be out of stock everywhere I’ve thought to look, but you can still get it in a 3-tea sampler stack, which I also have and like. It’s a loose-leaf tea, so I make it with this awesome set of tea infusers. If all that’s too much nonsense for you, regular teabags will work fine. I’m particularly find of Stash’s chai, too. [In case you couldn’t tell, I’m always down to chat about tea.]

In a medium bowl, whisk together the flour, sugar, cocoa powder, cinnamon, baking soda, baking powder, and salt. Set aside.

In a large bowl, beat together the buttermilk, oil, eggs, and vanilla extract until combined.

Fold in the dry ingredients until combined. It doesn’t have to be perfect, but all the dry stuff should be at least moistened, and there shouldn’t be any large lumps (I had some persistent lumps, so I mixed the batter briefly with my hand mixer to break them up).

Carefully stir in the hot tea and the hot sauce until fully-incorporated. It won’t want to mix in at first, but keep at it and it’ll eventually get there.

Divide the batter between your two prepared cake pans. Ideally, you’d do this with a kitchen scale to ensure accuracy, but no one will judge you if you just eyeball it (I did). Whack each cake pan on the counter a few times to release any air bubbles trapped in the batter.

Bake the cakes in the preheated oven for about 23-27 minutes, or until a toothpick inserted in the center comes out clean and the cake springs back when gently pressed. If your kitchen starts to smell deliciously chocolatey a bit earlier than expected, check the cakes for doneness then just in case.

Leave the cakes to cool in the pans for about 15 minutes, then run a sharp knife around the edge of each to release them. Carefully turn them out onto cooling racks to cool completely.
While the cakes are baking, start on the mandarin orange curd. First, set a medium, metal bowl inside a larger metal bowl filled with ice and water. The metal bowls are important here because you’re going to be pouring hot liquid into the smaller bowl, and the temperature difference can cause glass or ceramic bowls to crack.

In a medium bowl, whisk together the egg yolks, mandarin orange zest and juice, and sugar until smooth.

Cook the mixture over medium heat, stirring constantly, until it is thick enough to coat the back of a wooden spoon. This should take 5-7 minutes.


Remove the saucepan and stir in the butter cubes 1 at a time, waiting for each cube to melt completely before adding the next.


Pour the curd through a fine-mesh strainer into the smaller bowl you set up in the ice bath earlier. You may need to use a rubber spatula to help it through.


Let the curd sit in the ice bath until cool, stirring frequently to prevent a skin from forming on top. After about half an hour, it should be cool to the touch. At that time, press a piece of plastic wrap directly onto the surface of the curd and refrigerate it until set (at least 1 hour). You can pour it into a smaller container at this point if you prefer.

Once you’ve prepared your curd, it’s time to go back to your cakes. By now, they should be cool enough to handle. At this point, wrap each cake separately in plastic wrap and freeze them. Overnight is preferable, but if you can’t wait that long, try to leave them for at least a few hours. This will make them easier to work with when it comes time to level, frost, and fill them.
When you are about ready to start assembling your cake, it’s time to prepare the mandarin orange frosting. In the bowl of a stand mixer or other large bowl, beat the softened butter for about 3 minutes until it’s creamy.

Add 4 cups of powdered sugar and beat until fluffy.

Add the mandarin orange juice and zest and beat until creamy, about 5-7 minutes. Add the remaining powdered sugar 1 cup at a time, beating 2 minutes after each addition until smooth. Beat the frosting on low speed until it is smooth and spreadable.

Now it will all start to take shape, because it’s time to assemble! Take your cakes out of the freezer and unwrap them. If they’re a bit domed, now’s the time to level them (I didn’t and suffered the consequences). Place one cake on a cake board or plate, cut side up. Spread a thin layer of frosting all across the top and pipe a frosting “dam” around the edge using a piping bag or a regular ol’ resealable gallon bag.

Take your mandarin orange curd out of the fridge, discarding the plastic wrap, and carefully spread some inside the dam. Do not go above the dam! You will have leakage and you will be sad (I speak from experience).

Place your second cake cut side down on top of the bottom layer. I think it looks kind of like a giant Oreo.

Frost the top and sides of the cake with a very thin layer of frosting (this is called the crumb coat). Make it as smooth as you can, but don’t worry too much, because you’re going to add more frosting later.

If you’ve added too much curd and/or your cakes aren’t level, you may have some curd breaking through the dam. It’s not ideal, but just try to patch it with extra frosting as much as possible.

Chill the cake for at least an hour to set the crumb coat. While you are waiting, prepare your mirror glaze (if using) according to the directions in last week’s post.
When your crumb coat has set, take your cake out of the fridge. Smooth any obviously pointy bits with your fingers. With the remaining frosting, add patches to the sides of the cake. Hold an icing spatula or the flat side of a butter knife up the the edge of the cake and rotate the board to smooth the frosting over the side. Repeat as necessary until you’ve smoothed the whole side of the cake. Once the side is nice, smooth the top with extra frosting as well. A cake turntable is really helpful for this, but you can still get by without one.


If you’re not trying the mirror glaze (even though I think you should because it’s cool), you can stop now and add any finishing touches you like. If you are glazing, put the cake back in the fridge while you wait for your mirror glaze to cool to the proper temperature. The rest of the process is described in the mirror glaze post referenced above. I decided to add some red flourishes to the finish with liquid food coloring to add in some Iron Man colors, and it ended up being reminiscent of Iron Man’s suits exploding in the final battle scene (if you use your imagination ;-)).
Let your cake sit until set, then transfer back to a cake board or serving platter. Slice with a clean knife to serve and refrigerate leftovers for up to 5 days.
Enjoy!

You can download the printable PDF recipe here: Mandarin Orange Chocolate Cake
